
by Kathryn Brenne


Hem-stitch the garment.
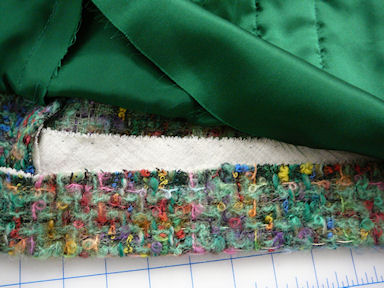
The hems of a couture garment should softly roll. Fold hems in place along the tracing line. Steam lightly. Baste in place. Use a hem stitch to sew the hem allowance to the hair canvas .
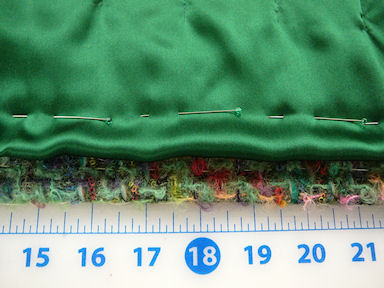
Fold lining under and baste, forming a jump pleat
The garment can be lined to the edge at the hem or have the lining finish with a jump pleat slightly above the finished edge of the garment. A jump pleat is a small fold at the bottom of the lining before it is sewn to the hem allowance. A jump pleat allows the garment to stretch slightly without pulling on the lining. I decided to leave the hem allowance at 2" and finish the lining with a jump pleat. This allows me to lengthen the jacket in the future if styles change. Fold the hem allowance of the lining up placing the fold 3/4" above the finished edge of the garment. Baste the lining to the garment. Sew the lining to the hem allowance with a small catch-stitch. Position the catch stitch up from the fold of the lining, creating a jump pleat when finished.
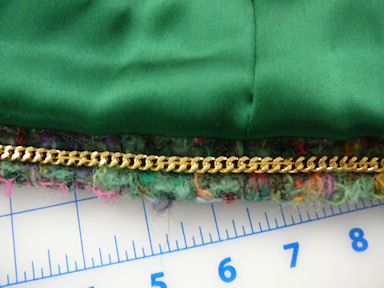
Chain is basted to the garment.
The chain weight used in the classic French jacket is different than those found at the hardware store: it has flat links and should have some weight to it. Aluminum chains are too light. The chain that I use is made out of metal and has flat links approximately 5mm in diameter. It is available in silver or gold. (Many of the chains found on today's ready-to-wear jackets are too fine or too light weight to serve the intended purpose and are just a prestigious symbol.)
The chain weight can be sewn to the garment 3/8" above the finished hem. Depending upon how the lining was finished the chain may sit on the lining or on the fabric. The chain can start a few inches back from the front edge and go all the way around the garment or, if the garment has heavy metal buttons, these may act as a weight for the front, in which case the chain need only be applied to the back of the garment.
Pin the chain to the garment taking care not to pull it too tight. Use wire cutters to cut off any excess. Baste the chain to the garment.
Stitch the chain to the garment. My vintage couture jacket has the chain stitched though each link on both the top and bottom edges of the chain with a waxed double strand of polyester thread. This keeps the chain straight and prevents it from dropping down. Here's a great tip I learned from Jon Moore: when working with a double strand of thread, thread both of the cut ends through the eye of the needle. When you take your first stitch, stitch through the looped end of the thread creating a knot. The cut ends are then free to adjust in length as you work. Sometimes one thread will shorten more than the other but with this technique you will not get loops in your work.
Work along the top edge of the chain first, positioning the thread so that it is hidden by the link. Come back along the bottom edge of the chain. Take care to make sure that the stitches do not show on the right side of the garment.
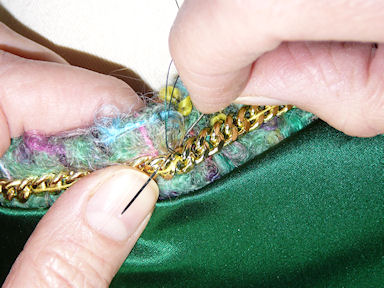
Take a stitch into each link.
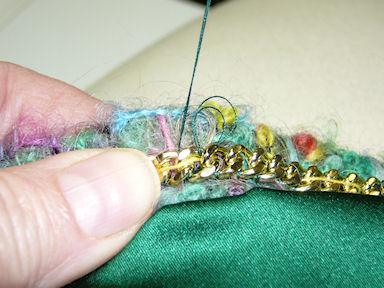
Pull thread up. It is hidden by the overlapping links.