
by Kathryn Brenne
- Sewing Workshop
Bells & Whistles Shirt - Vogue 1248
Shirt and Skirt - Cutting Line Designs
The Directorĺs Cut - Design and Sew
#329 View A


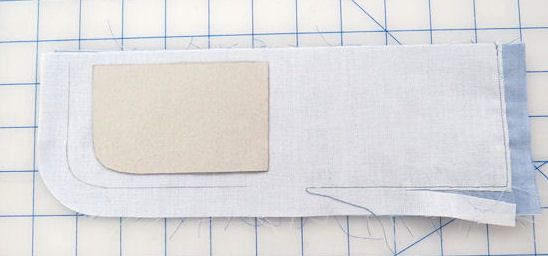
Use a cardboard template to pencil stitching line onto the interfacing of a curved cuff.
Use 505 temporary spray adhesive to hold the sew-in interfacing in place. For a curved-shaped cuff use a cardboard template cut from thin cardboard to mark the stitching line onto the interfacing with a fine pencil. The template should have no seam allowance and is cut to the stitching line. Cut the undercuff 1/16" smaller than the upper cuff as was done for the undercollar. Sew the two cuff layers together. Trim seam allowance to 1/4" on straight edges and 1/8" along curved edges. Edgestitch the entire cuff after it is attached to the sleeve.
Turn cuff right side out and press.
Pin the cuff to the shirt aligning notches. The edges of the cuff should align with the edges of shirt placket or the extended under layer edge and folded edge of the blouse placket. Stitch the cuff to the shirt.
Press the seam allowance towards the cuff. Grade the seam if it is thick.
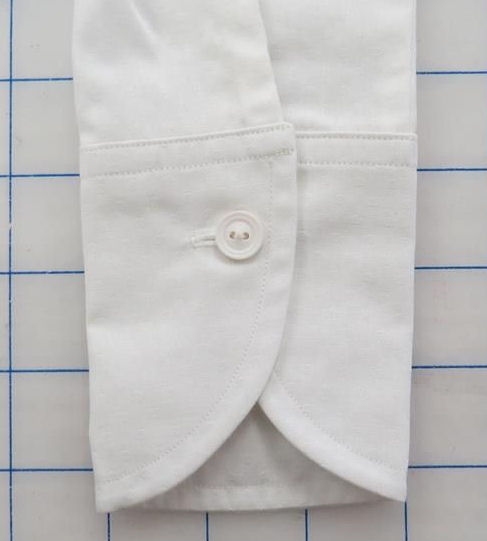
Press under the raw unfinished edge of the under cuff. Pin or baste the folded edge of the under cuff to the stitching line. Edge stitch the entire cuff after it is attached to the sleeve catching in the folded edge of the under cuff. As in the photo, you may then topstitch the upper edge at 1/4".
Make buttonholes in the cuff and attach the buttons.