


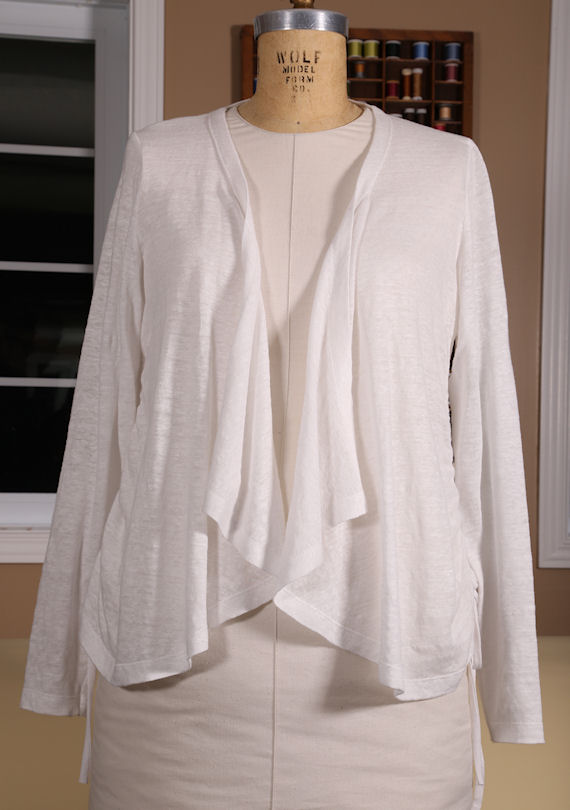
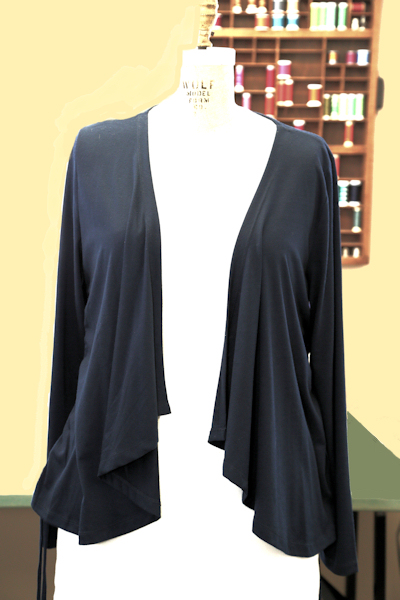
Inspiration garment
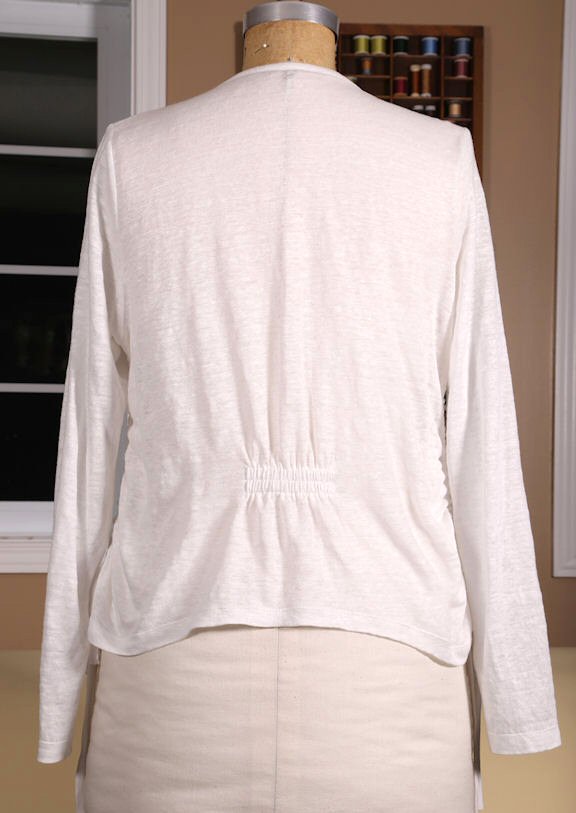
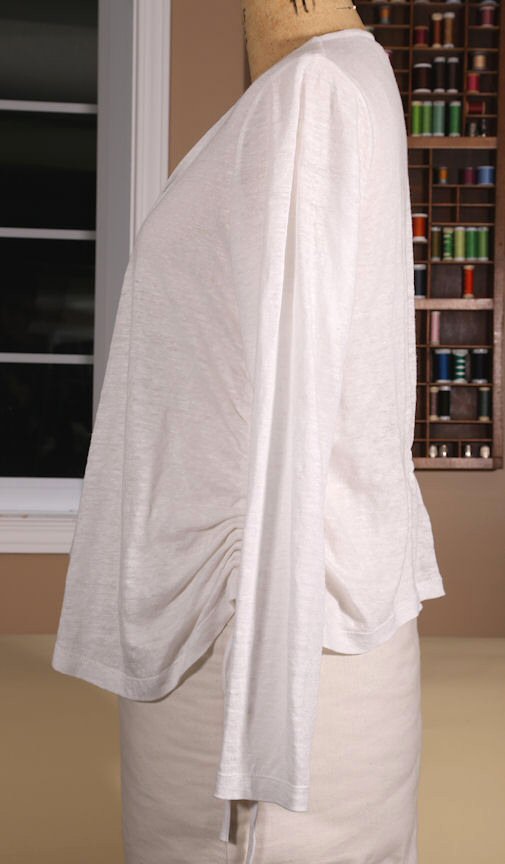
Linen knit is perfect for a lightweight little cardigan to wear in the summer season. This simple little cardigan was inspired by a ready-to-wear cardigan that I own. It has a wide front extension that becomes a draped edge. The side seams are ruched with a drawstring cord, and the back has a shaped hemline which is pulled in at center back with elastic. The lightweight linen knit does not have as much stretch as 11 oz jersey or 14 oz jersey, so to compensate for this, the sleeve was widened and the armhole was deepened to allow for more movement. The neckline was also widened slightly from the original pattern.
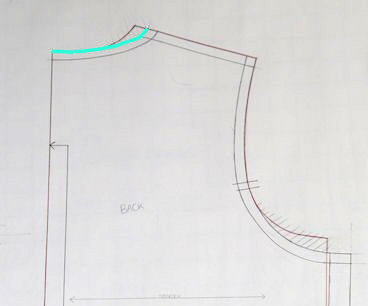
Begin with a traced copy of your Basic Tee pattern draft, using the method described in 'The Basic Tee Pattern'. Starting with the Back, widen the neckline slightly, if you wish, by shortening the shoulder seam at the neck edge. Shortening the shoulder seam by 1/2" will to give a flatter, wider curve to the back neck edge.
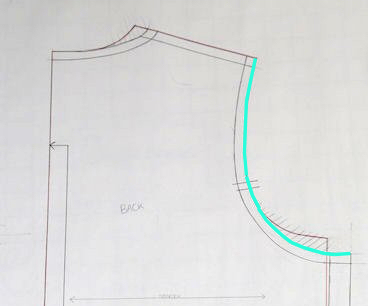
Lower the armhole by 5/8" at the side seam. Redraw the armhole beginning at the notch and curving down to the new lower point at the side seam. The curve should meet the side seam at a 90 degree angle.
Extend the length of the side seam by 4 1/2" to allow for ruching. Widen the original pattern at the hip by 1 1/4". This extra fullness will be taken up with the elastic in the back and the side ruching. Beginning at the underarm, gently curve the side seam out to the new hipline and continue to the new hemline.
Lengthen the original pattern at center back by 1/4". Draw in a new Back hemline, which gently curves from the extended center back to the new lengthened side seam. The hemline should meet the side seam in a 90 degree angle.
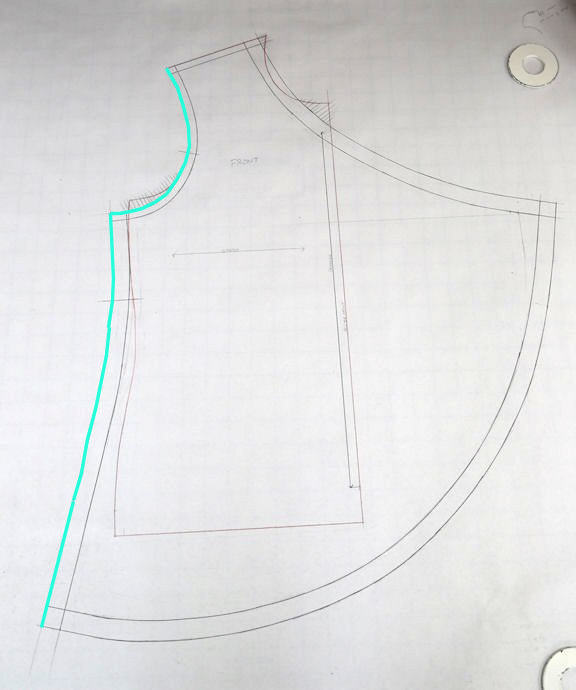
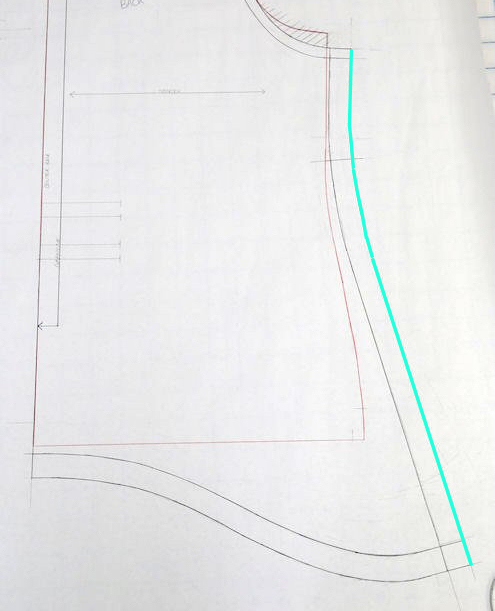
Now duplicate the changes made on the Back armhole and side seam to the Front. The armhole is dropped 1/2", the side seam is lengthened by 4 1/2", the hip is widened by 1 1/4" and a new side seam is drawn in.
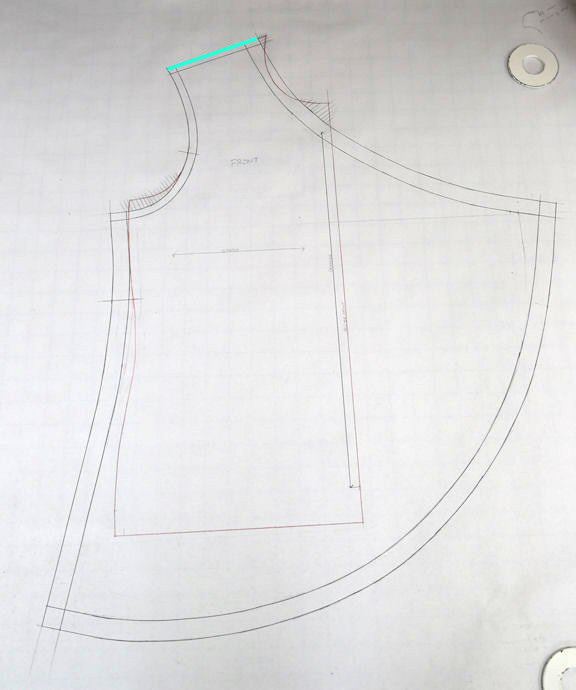
For the Front, shorten the shoulder seam by 1/2" to match the change made to the Back.
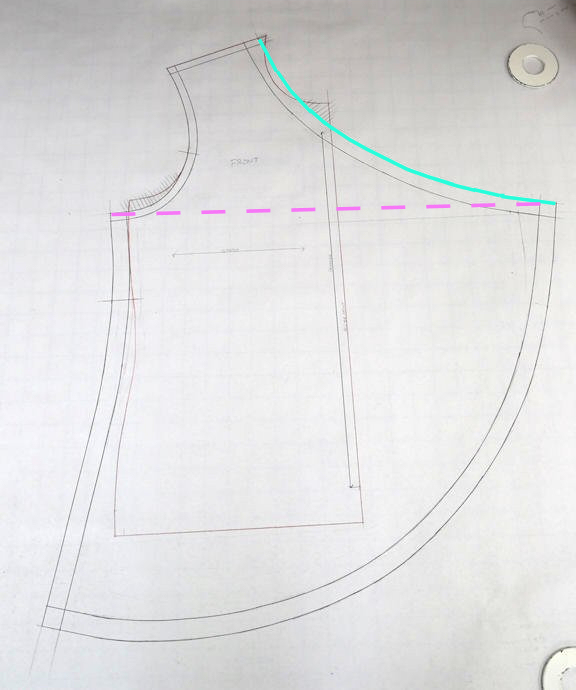
From the new lowered armhole draw a guideline at 90 degrees to center front that extends from the underarm through center front and extends for 10". This will become the Front drape. From the new neck/shoulder point draw a gentle curve to the 10" extension point.
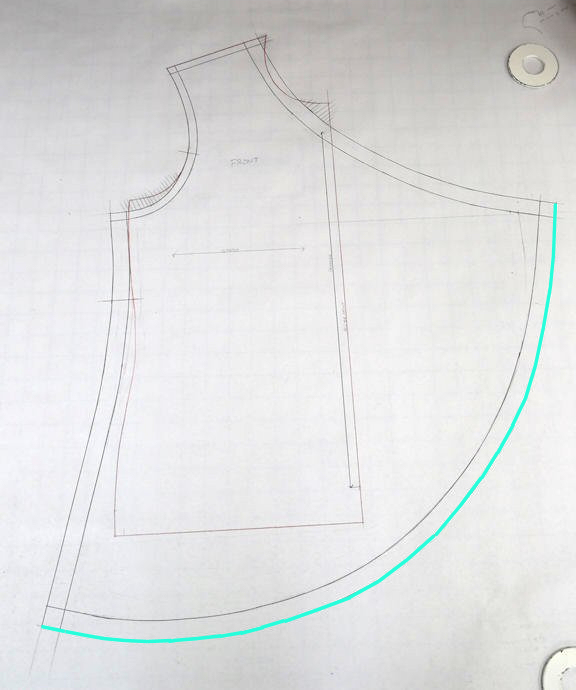
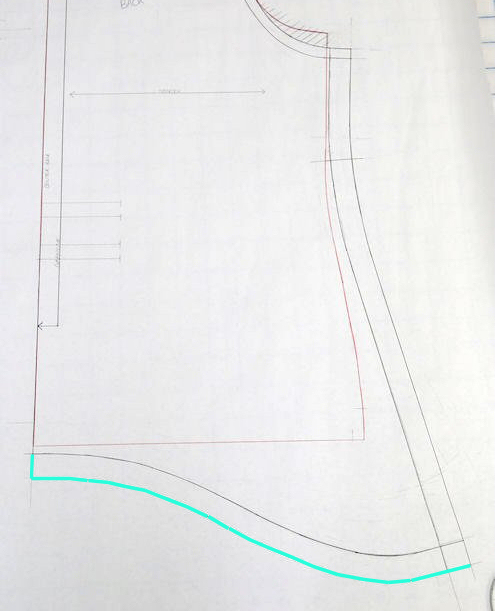
Create a new Front hemline by drawing a circular line from the Front extension line to the new side seam. The curve should meet the side seam at 90 degrees.
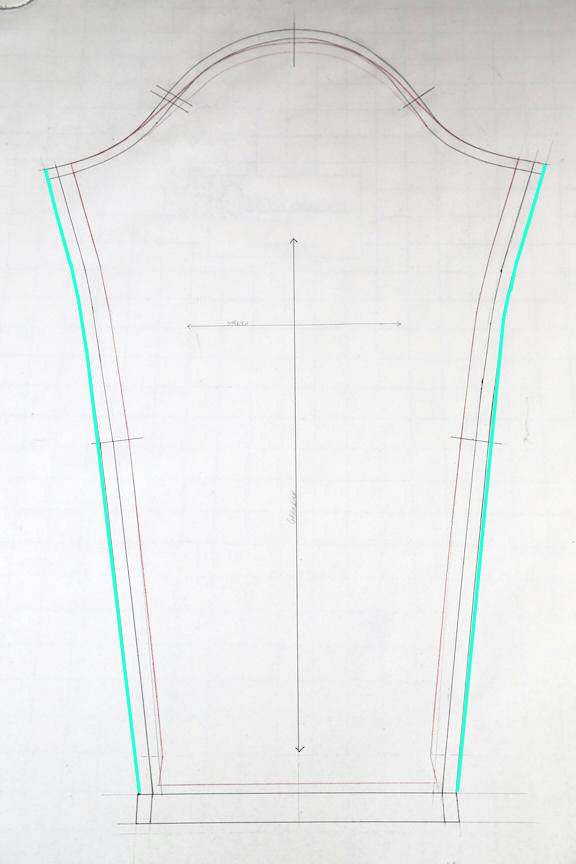
To widen the sleeve, add 1/2" to each seam.
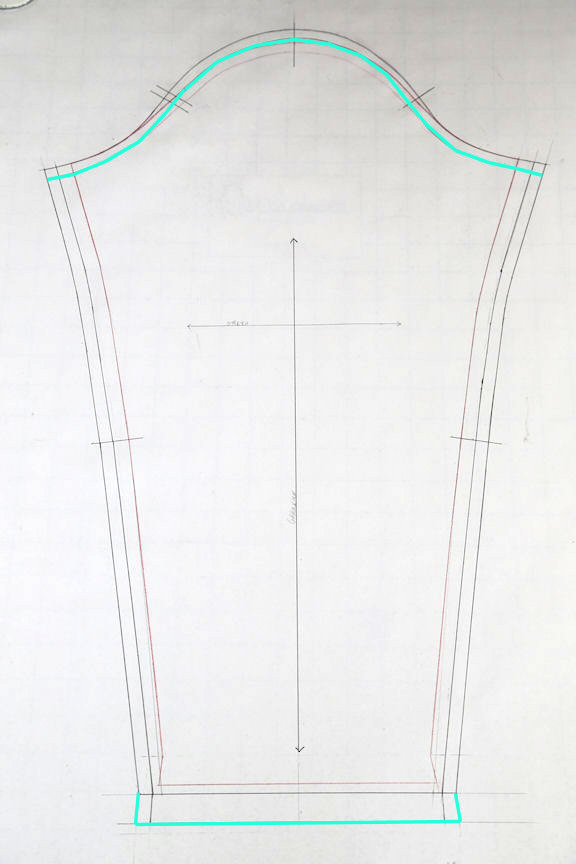
To adjust the sleeve to fit into the new bigger, deeper armhole, drop the seam line of the sleeve cap 1/2" at each side. From this new lower point redraw the seam line of the cap to curve into the original cutting line at the cap of the sleeve.
Lengthen the sleeve by 1 1/4" as I did, or to your desired length.
A couple of seam allowance changes need to be made to the new draft. Increase the Front and Back side seams to 1", which will become the casing for the draw cord. All hem allowances on the Front, Back and Sleeve should be 1".
Mitered corners are drafted at the corner of the Front drape and hemline (see instructions below).
Mitered corners create a nice flat angle where two edges come together. Use this method to draft a mitered corner for any hem allowance width or angle.
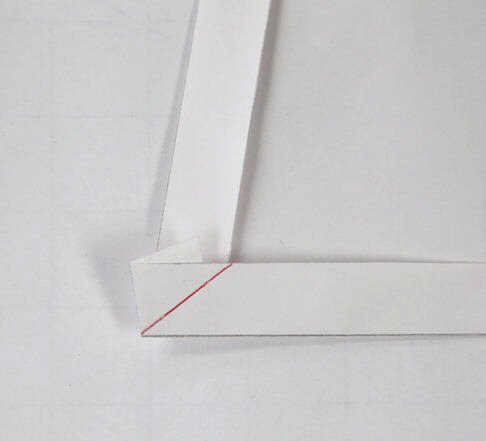
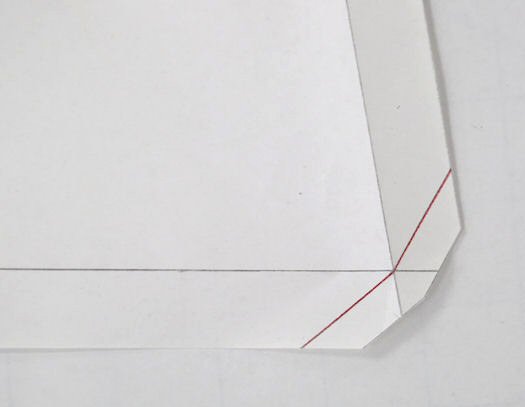
Fold the hem allowance on the paper pattern up. Fold the second hem allowance or edge over the first edge. Draw a line from the inside corner of the intersection of the two edges to the outer corner. Refold the hem allowance in the opposite order so the marked allowance is now underneath the unmarked edge. Draw a second line from the inside corner to the outer corner.
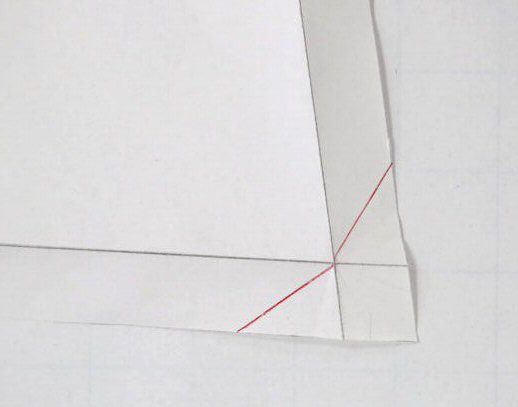
Open out the hem allowances. The two pencil lines will now form one continuous line. This line, which is the stitching line, may or may not be a 45 degree angle, depending upon the shape of the corner and the width of the hem allowances. kbtp_dkb56623_1
Add a 1/4" seam allowance to the outer edge of the stitching line. Trim away the excess paper.