
Brocades: Day to Evening Elegance
by Kathryn Brenne
by Kathryn Brenne


Bagging a Lining
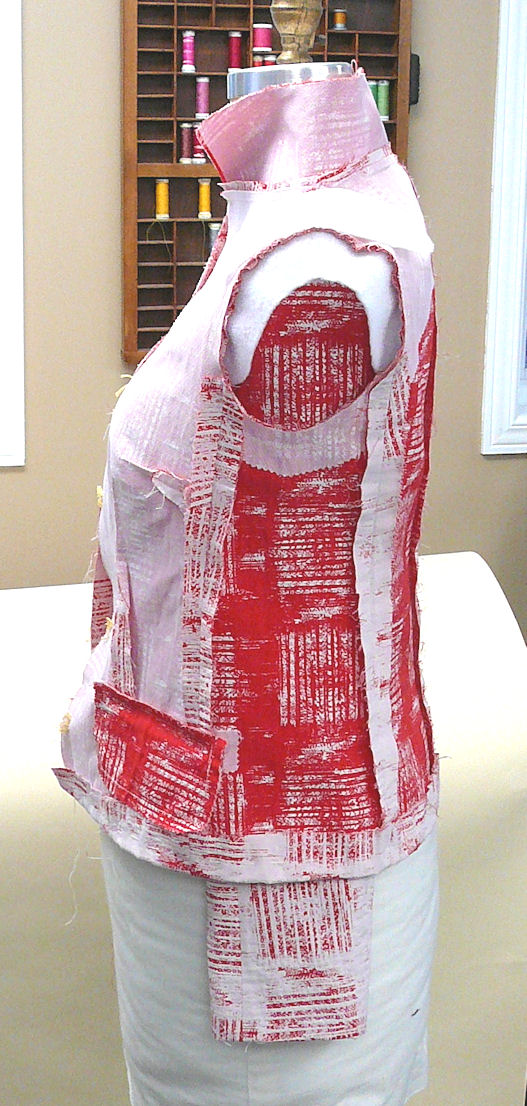
Jacket is ready to have lining inserted
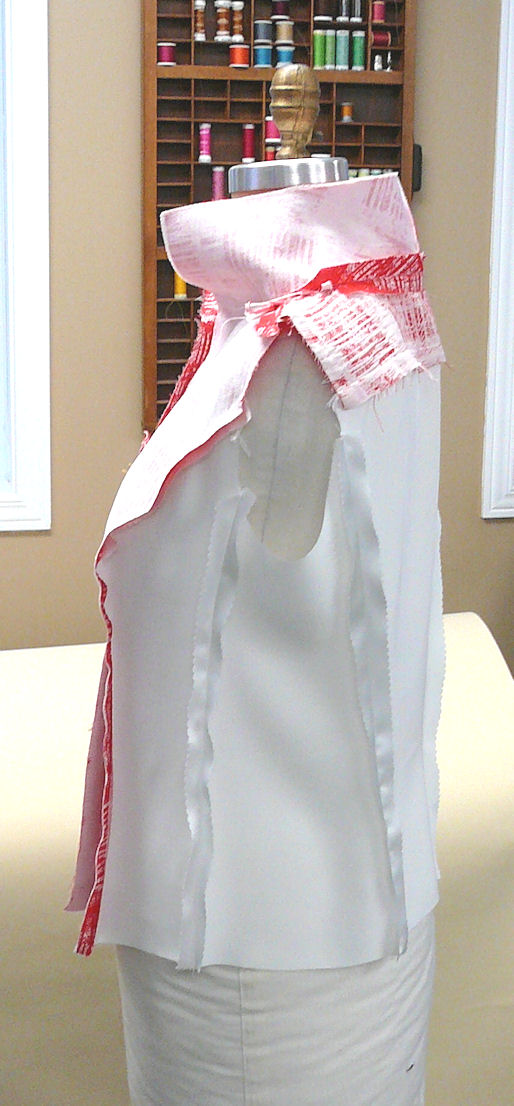
Lining ready to set into jacket
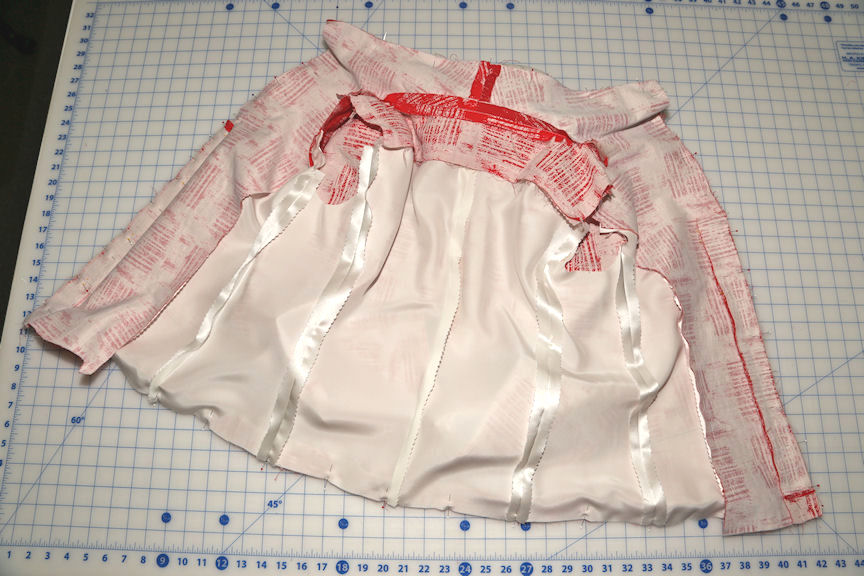
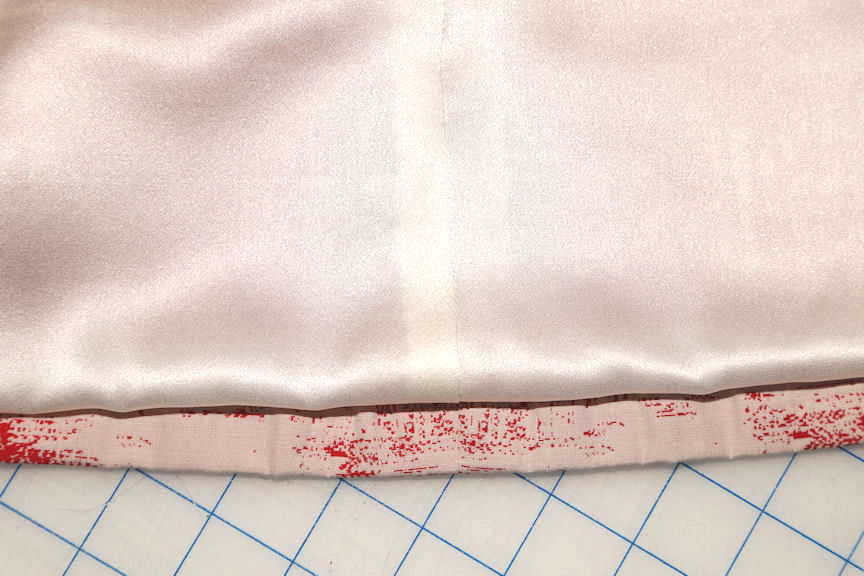
Leave the bottom edge of facing and lining unsewn
Lining/facing pinned to garment
Lining should have a soft roll jump pleat at the hem
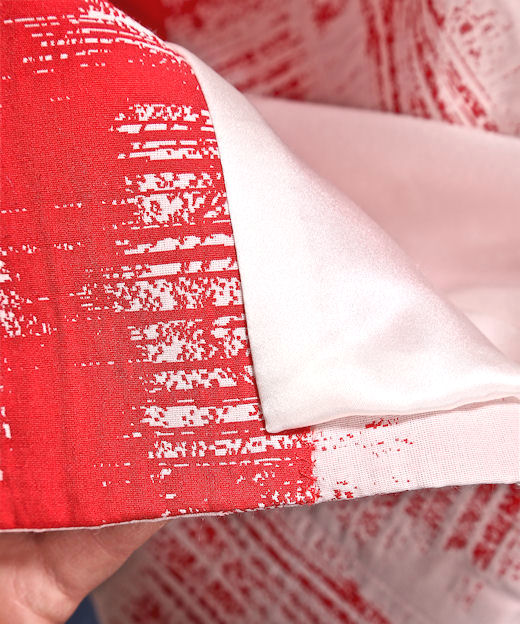
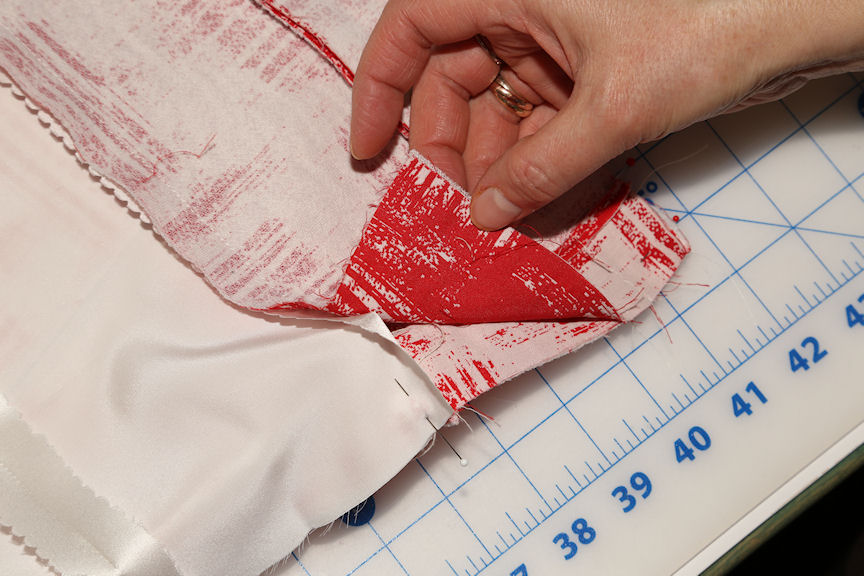
Finished corner with hem of the facing catch stitched and lining felled to the facing
Close up of catch stitch

Pin collar seam allowances together and sew by hand from inside the garment
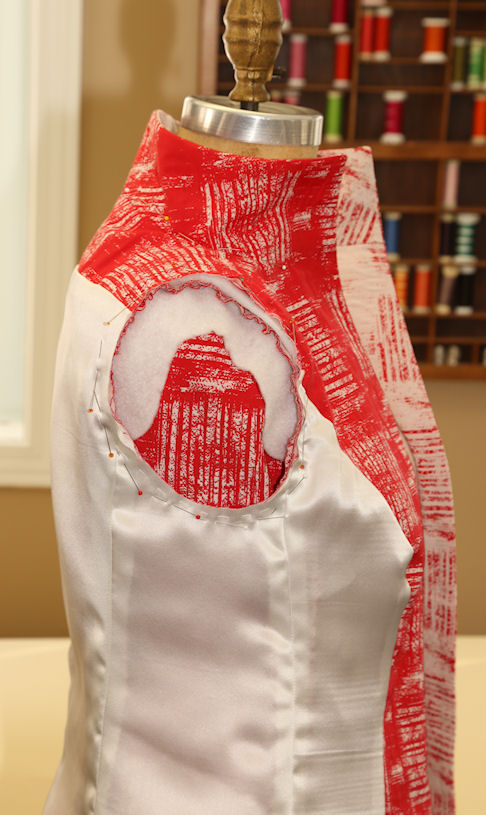
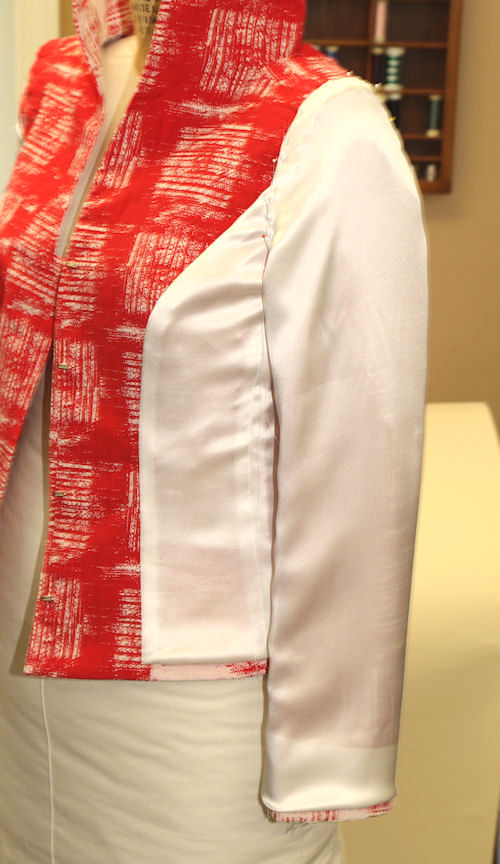
Lining/facing have been bagged, sewn, turned right side through, baste layers together around the armsyce
Sew sleeve lining to hem allowance of the jacket sleeve
Sleeve lining pinned into place
Close-up view
Fell stitch
Bagging a jacket lining is a ready-to-wear technique in which the entire lining is sewn in by machine. Linings that are completely machine-bagged can be loose around the armhole, so I prefer to combine the bagging technique for the body of the jacket with a hand-finished sleeve lining insertion, which holds the lining in place nicely:
Jacket is ready to have lining inserted
- Completely finish the body of the garment including hand-sewing the hems. Use this technique to sew the hems in place making sure that the hand stitching is placed approximately 3/4" down from the top edge, which will allow you to machine stitch the lining to the edge. (Linings should be cut ½" longer than the hemmed length of the body and sleeves for this bagging technique, so check the lining pieces of your pattern and adjust if necessary.)
Lining ready to set into jacket
- Assemble the facings (don't attach to the jacket yet) and assemble the body of the lining. Sew the lining to the facings.
Leave the bottom edge of facing and lining unsewn
- Stop sewing approximately 4 inches up from the bottom of the facing when attaching the lining to the facing. Do not sew the sleeve linings into the body lining.
Lining/facing pinned to garment
- Pin the facings and collar (if there is one) to the garment, right sides together. Pin the hem of the lining to the hem allowance of the garment. Machine stitch the prepared lining/facing to the garment.
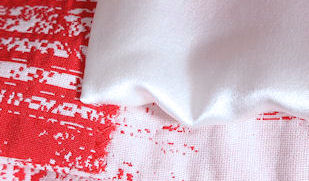
Lining should have a soft roll jump pleat at the hem
- Turn right side out and press facings and collars. The lining hem should have a soft roll jump pleat. Do not press this flat.
Finished corner with hem of the facing catch stitched and lining felled to the facing
Close up of catch stitch
- At the edge where the lining and facing meet, tuck the jump pleat of the lining up inside. Neatly trim the facing and use a tiny catch stitch to hold it flat against the hem allowance. Using a fell stitch close up the small opening where the lining was left unstitched when attaching it to the facing.
Pin collar seam allowances together and sew by hand from inside the garment
- Pin the collar seam allowances of the facing and the jacket together. Going through the armhole opening, hand sew these seam allowances together with a running stitch. This prevents the facing from pulling away from the garment.
Lining/facing have been bagged, sewn, turned right side through, baste layers together around the armsyce
- Pin the armsyce of the lining to the armsyce of the garment. Use a stab stitch to sew the layers together stitching just inside the stitching line.
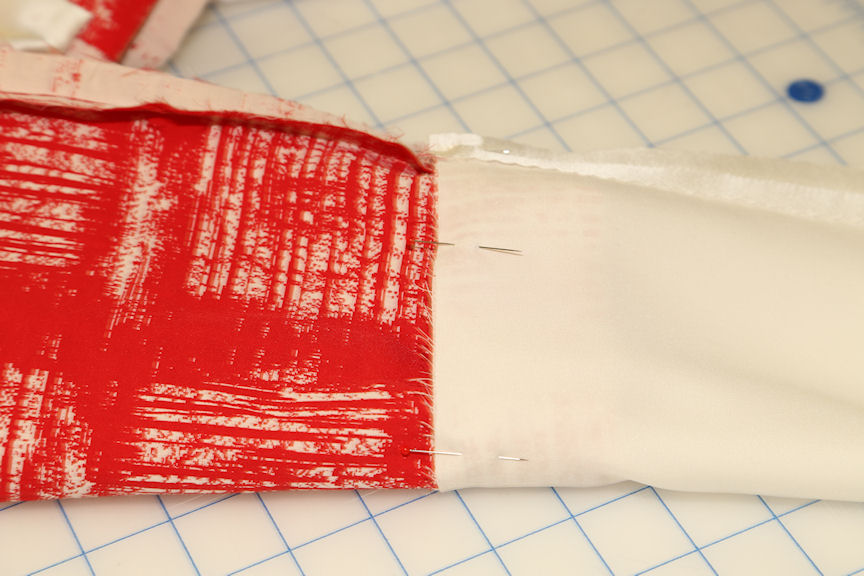
Sew sleeve lining to hem allowance of the jacket sleeve
- Prepare the sleeve lining by sewing the sleeve seams. Sew the hem of the sleeve lining to the sleeve of the garment using this method: Turn the jacket sleeve inside out. Pin the lining right sides together to the jacket sleeve hem allowance. The circumference of the sleeve is quite small so you cannot lay it out flat to sew it. The foot of the machine will be inside the circle, so as you sew the two together you will have to stop and rotate the sleeve.
Sleeve lining pinned into place
Close-up view
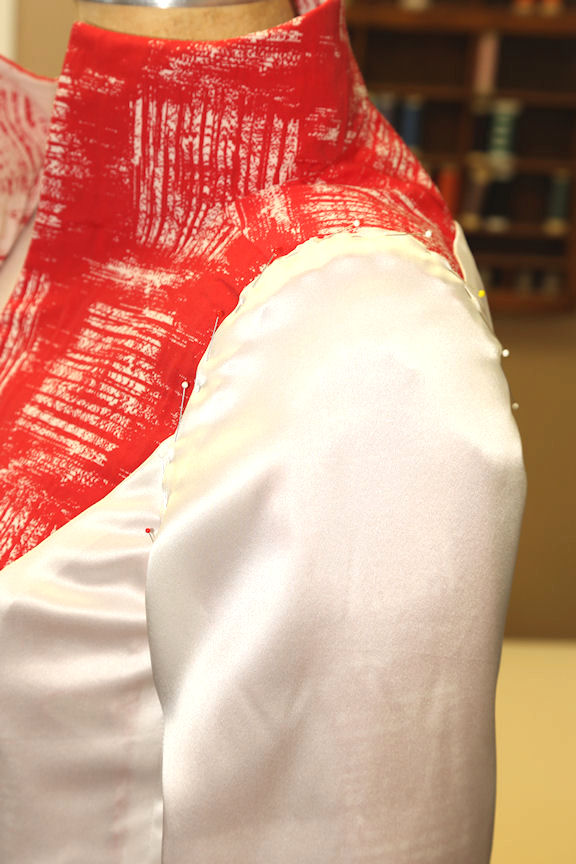
- Then, with the jacket turned inside out and working on a dress stand, bring the sleeve linings up to the armsyce. Pin the sleeve linings in place making sure that there is not too much fullness in the sleeve cap. Baste the layers together.
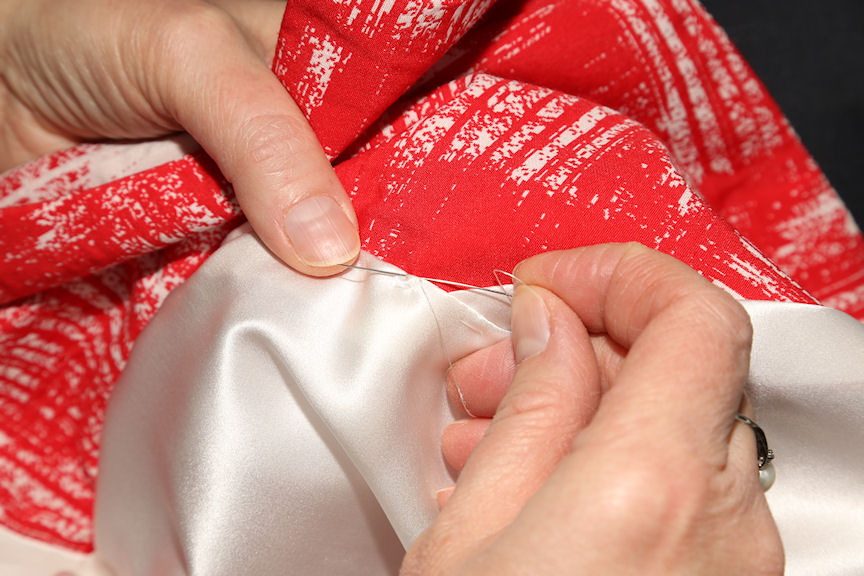
Fell stitch
- Use a fell stitch to hand sew the sleeve lining to the armsyce.
Copyright (c) 2018 by EmmaOneSock