
by Kathryn Brenne


Most traditional marking methods of tracing paper or chalk pencils will not show up on tweed or bouclé fabrics, so it's best to thread-trace all markings, fold lines and seam lines that you need during the construction of the garment. I mark notches with a double strand of basting thread, taking several small running stitches into the seam allowance. Darts and pocket placements can also be thread-traced.
I use the selvedges from silk lining as a stay tape. Cut the selvedge a generous 3/8". Pin the stay tape to the neckline of the jacket front and back pieces with the finished edge of the selvedge laying towards the inside of the garment and the cut edge towards the seam allowance. Baste and then permanently sew to the garment with a tack stitch worked from the right side of the garment along the stitching line.
As mentioned, although my vintage jacket has no interfacing, I added a bit of lightweight hair canvas to the hem allowances, pockets and front of my garment to help maintain its shape.
For the hems, the hair canvas is cut on the bias to give a soft roll to the hem and to prevent it from stretching over time. Cut the strips twice the width of the hem allowance plus 1 1/2". For instance, for a 2" hem allowance cut the strips 5 1/2" wide. Pink one edge of the strip. This will give a softer finish to the edge that sits into the garment.
Pin the strips to the edge of the garment. Working from the right side of the fabric, tack-stitch the interfacing to the garment along the hemline, which has been marked with a thread tracing. Working from the inside of the garment, hem the upper pinked edge of the interfacing to the garment using a hemming stitch.
Interfacing is tack-stitched along the hem fold line and hem-stitched along the pinked edge.
Pinked edge of interfacing is hem-stitched to the garment.
For the front of the jacket cut two pieces of hair canvas on the lengthwise grain of the fabric. This interfacing will support the buttons and buttonholes. Depending on the width of the buttonholes, a 4" wide piece should be wide enough in most cases. Pink one edge of the strip. Pin the strip to the garment. Tack-stitch the interfacing to the garment along the front fold line. Hem-stitch the edge of the interfacing to the garment. Use a catch stitch to join the front interfacing to the hem interfacing, overlapping the two slightly.
Pink the lower edge of the bias cut chest shield. Position the chest shield onto the garment fronts after any princess seams have been sewn. Sew the chest shield to the neck, shoulder and armholes edges with a tacking stitch.
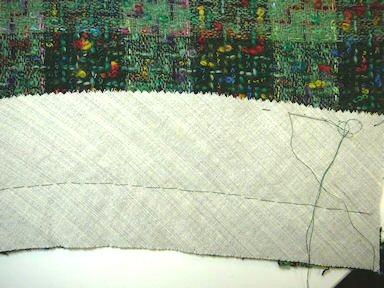
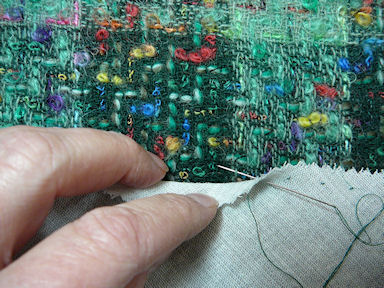
I also used lightweight hair canvas to back the pockets. Cut the interfacing the same size as the pocket. Use a tack stitch along the upper fold line and along the stitching lines to attach the interfacing to the pocket fabric.
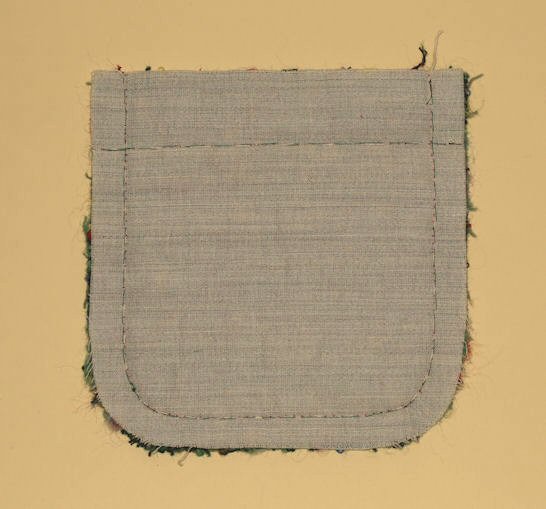
Interfacing is tack-stitched to the pocket along the fold lines.