
by Kathryn Brenne


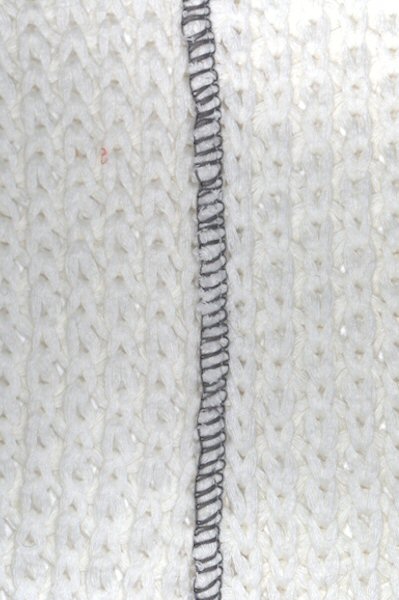
zig-zag seaming on sewing machine
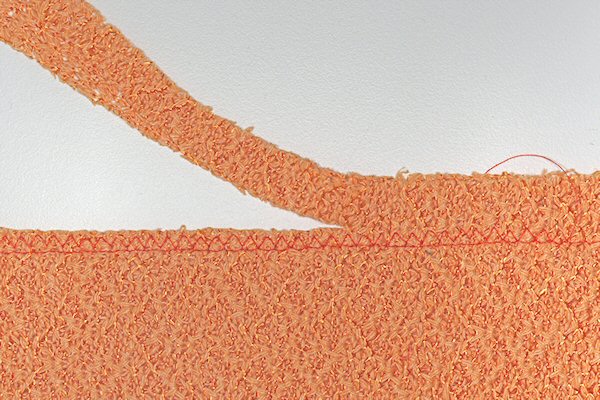
Sweater knits can be seamed on the sewing machine or serger. For seaming on a sewing machine, stitch the seam using a slight zig zag with a width of .5mm and a stitch length of 2.5mm. For bulky sweater knits lengthen the stitch length to 3mm and use a wider stitch width. Sew a second row of zig zag with a stitch width of 3.5mm and a stitch length of 2.5mm beside the first row inside the seam allowance. Trim the fabric away close to the second row of stitching. This technique prevents edges from rolling when the garment is washed.
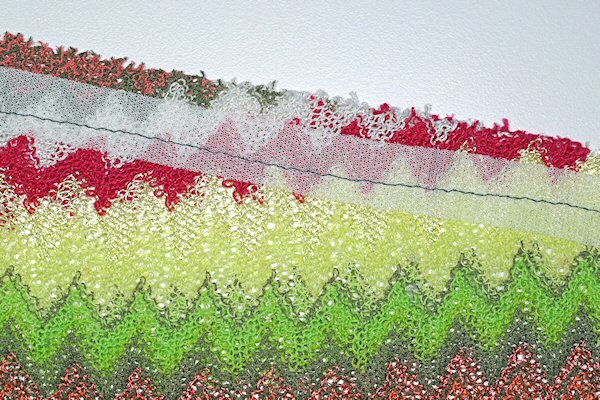
lapped seam for stable knits
To create a decorative seam on stable knits such as boiled wool or double knit try using a lapped seam in which one of the seam allowances is removed. Chalk and cut away the overlapping seam allowance. Chalk the stitching line on the underlap layer. Apply a product such as Steam a Seam Lite to the wrong side of the overlapping edge. Align the overlapping edge to the chalk line and press to hold. The Steam a Seam Lite will hold the layers together. Use Aurafil 100% Cotton Mako 12 weight thread and a security triple zig zag stitch set with a stitch width of 7mm and a stitch length of 3.5mm to stitch over the raw edge. The triple zig zag stitches in and out of the same hole several times giving the stitch extra strength and good definition. The knit fabric will not fray.
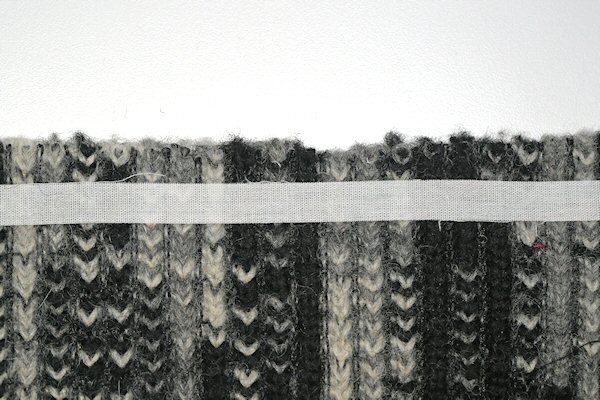
jersey binding application
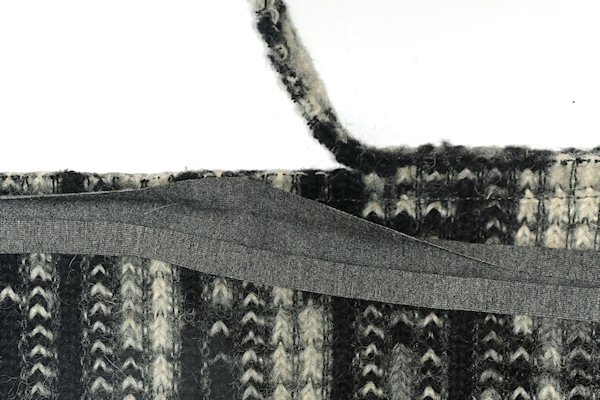
A bound seam creates a nice clean finish for a neckline with a collar or hood, particularly on bulky sweater knits. It is soft and comfortable against the skin. Use rayon jersey to make the binding. Cut the binding 1 1/2" wide on the lengthwise grain of the fabric. Use a 3/4" Clover binding tip and iron to fold the binding. Sew the seam of the garment on the sewing machine at 5/8". Trim the seam allowance down to 3/8". To reduce some of the bulk when joining two collar layers to the garment, as on the bulky sweater knit jacket (below), you can trim the center seam allowance of the three layers even shorter than 3/8". If the sweater knit is particularly bulky serge the seam allowance to compress it and hold the layers together. Open out the folded edges of the binding. Sew the binding to the garment with a 3/8" seam allowance. The stitching should align with the fold of the binding. Stretch the binding slightly as you sew it to the garment. Fold the ends of the binding in on themselves. Wrap the binding over the seam allowance and hand stitch in place.
To serge seams, use a four thread serge, which will work beautifully in most cases. However, for loosely knit bulky sweater knits that tend to come undone easily, and very open knits, I cut the seam allowances 1" wide and then hand-baste the seams together using cotton basting thread. The basting thread will help to control the fabric from stretching. Then you can serge using a wide four thread serge.
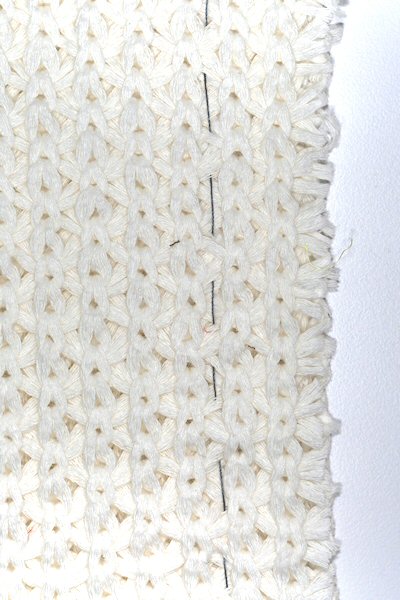
hand-basted seam
4-thread serged seam
Shoulder seams on sweaters can stretch and grow. To prevent this from happening the shoulders need to be stabilised. Here are two different methods that can be used, both of which work equally well.
One method is to first cut lengthwise strips of lightweight tricot fusible interfacing 1/2" wide. Fuse strips to the back shoulder placing 1/8" of the strip into the garment and the remainder into the seam allowance. Sew the shoulder seam using one of the methods outlined above. Press the seam towards the back.
clear elastic at shoulder seam
For closer fitting sweaters that may be pulled over the head, I like to use clear 1/4" elastic. The elastic can stretch and has great recovery. With the back shoulder piece facing up, place a strip of clear elastic under the needle and sew the seam, through the elastic and the two layers of fabric. Do not pull or stretch the elastic. Press the seam towards the back, avoiding pressing directly on the elastic.
stay tape to stabilize neck edge
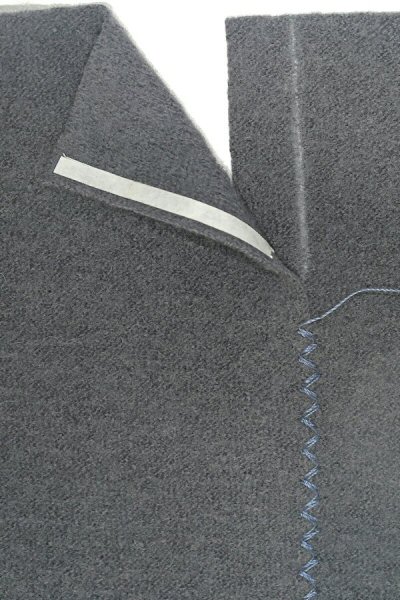
Some neck edges may need stabilising. For the bulky sweater knit jacket, I fused a piece of straight precut tape (Design Plus works very well) to the neck edge of the garment. I aligned the edge of the stay tape to the stitching line. The stitching held it in place and was later covered with a binding, which hid the stay tape.