


Before we get into the individual garments, let's review some basic sewing techniques for working with these wonderful fabrics.
Seaming for lightweight jersey fabrics can be done on the sewing machine or serger. Use a fine size 60 ballpoint needle. If using a sewing machine, sew the seam using a very narrow .5mm zigzag. Sew a second row of wide zigzag stitches with a width of 3.5mm next to the first row. Trim away the seam allowance close to the second row of stitches. If constructing the garment on a serger, use a 4-thread overlock stitch to reinforce the seam, and a narrow cutting width. Adjust the differential feed to prevent stretched, wavy seam allowances. Use wooly nylon in the loopers for a less rigid stitch and seam allowance, which is less likely to ripple when complete.
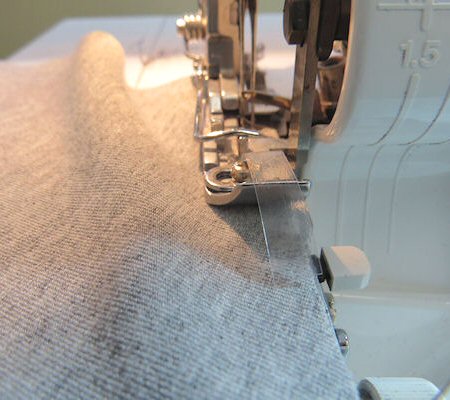
Try using a twin needle or cover stitch machine (if you have access) to finish neck and armhole edges. To stabilize the cut edges, serge the edges first, using serger thread. Adjust the differential feed if the fabric is being pulled too tightly. Press the seam allowance towards the inside of the garment. Use the cover stitch machine or a narrow twin needle to topstitch the edge. Set the stitch length at 3-3.5mm. Using wooly nylon in the looper of the cover stitch machine will create a more pliable edge.
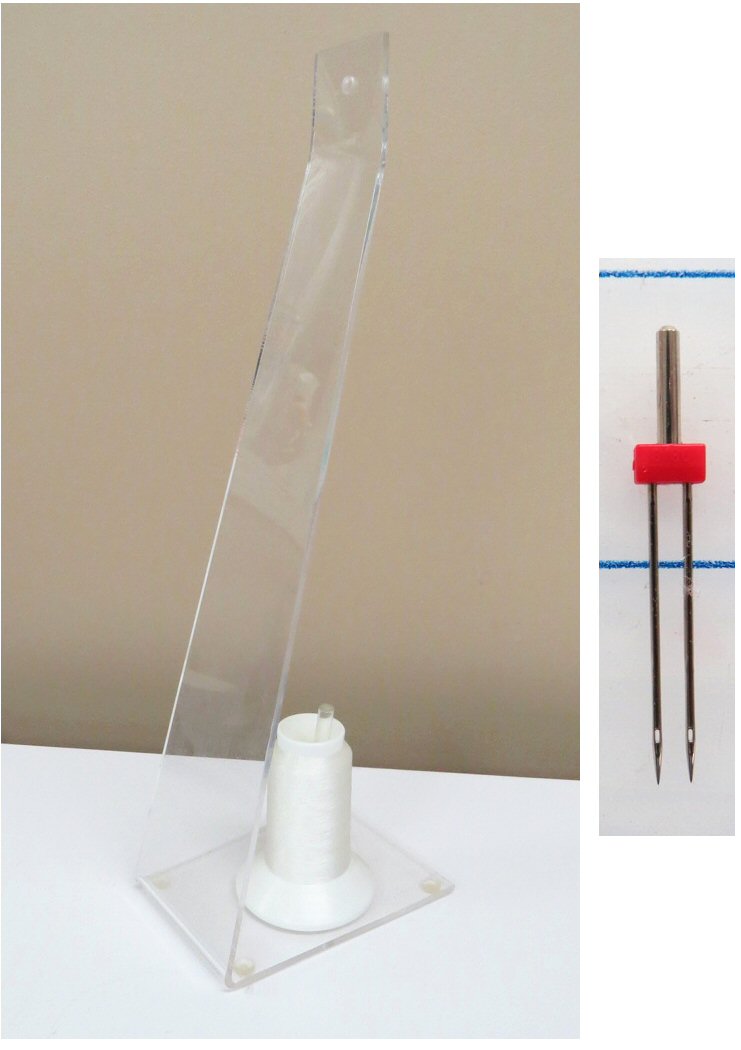
Extra spool holder and twin needle
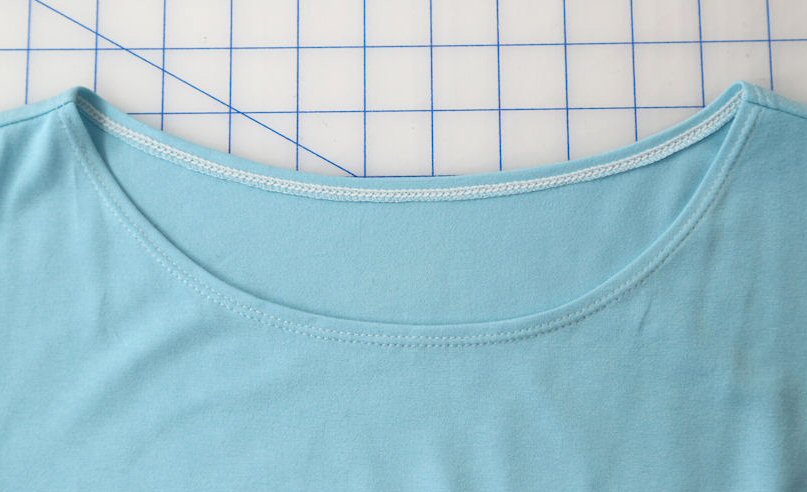
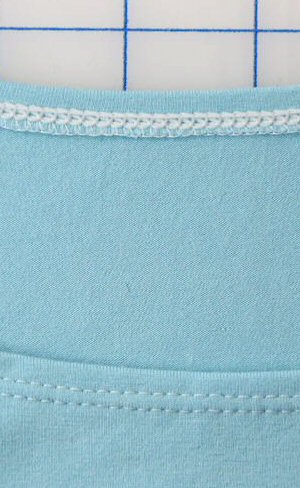
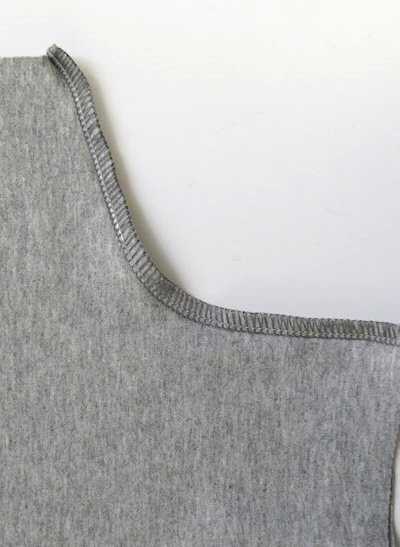
Finished neckline
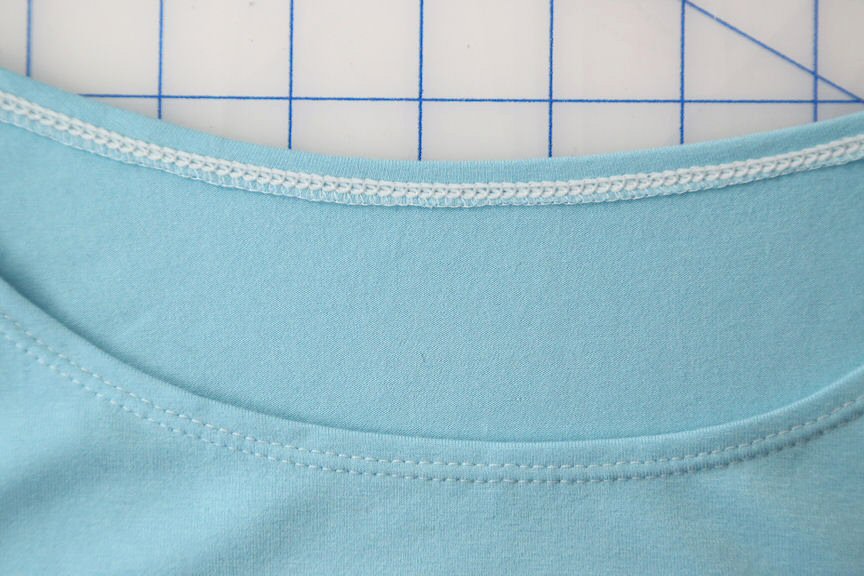
Close up
The neckline was serged first before using the cover stitch machine to finish the edge. Wooly nylon was used in the looper of the cover stitch machine.
If you have difficulties inserting sleeves smoothly into a Tee, try pinning them in first, evenly distributing the ease and then basting by hand. Test fit the garment to ensure that the ease is distributed correctly. Once you are happy with the results use an overlock stitch on the serger with wooly nylon in the loopers. The wooly nylon will give a softer edge to the seam allowance.
Two of the styles in this tutorial have mitered corners. So here's how to make them perfect! Instructions for drafting a pattern for a mitered corner are covered later in this tutorial.
Sew the mitered corner with a 1/4" seam allowance.
Trim the inside tip of the seam allowance at an angle to reduce bulk.
Press the seam allowance open. Press up the hem allowance.
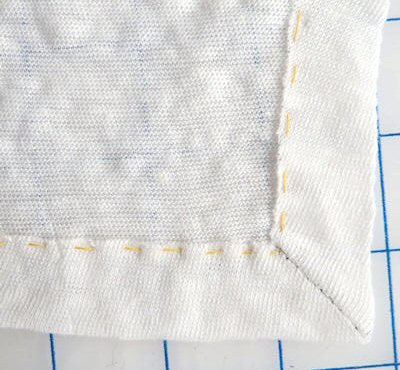
Baste hem allowance to hold in place.
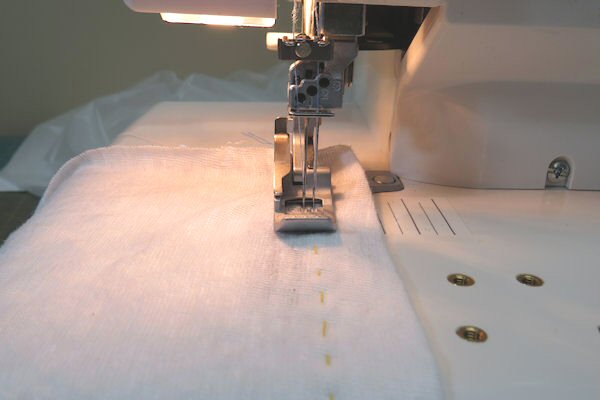
Use the basting stitch as a guideline to align the cover stitch foot with the raw edge of the fabric.
Finish the hem with a twin needle or cover stitch machine. If using a twin needle, topstitch the hemline and then trim any excess close to stitching. If using a cover stitch machine, use wooly nylon in the looper. Test the stitch position first on a sample trying to align the cover stitching on the right side of the fabric so that it is positioned over the raw edge on the underside.
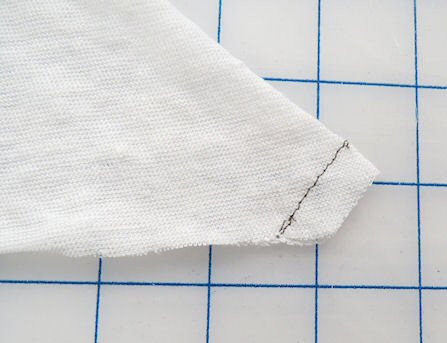
To create a corner with the cover stitch, end stitching a few stitches beyond the corner in one direction and start the opposite side a few stitches in from the corner. kbtp_img_3446_1
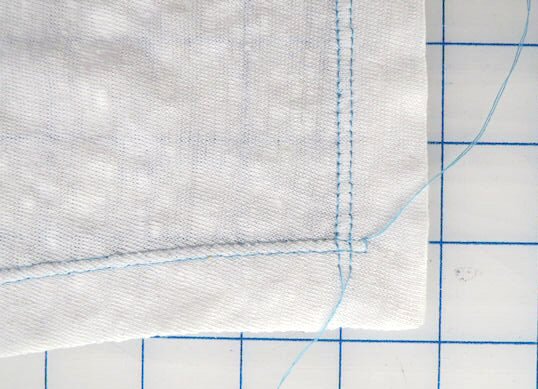
Cover stitched corner with the two rows of stitching overlapping.

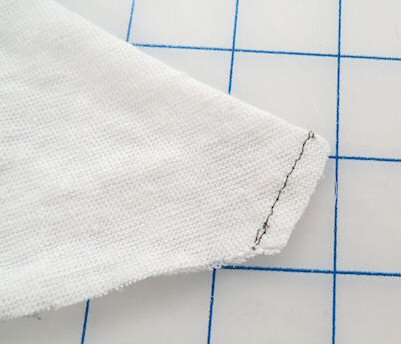
Wrong side of cover stitched corner.
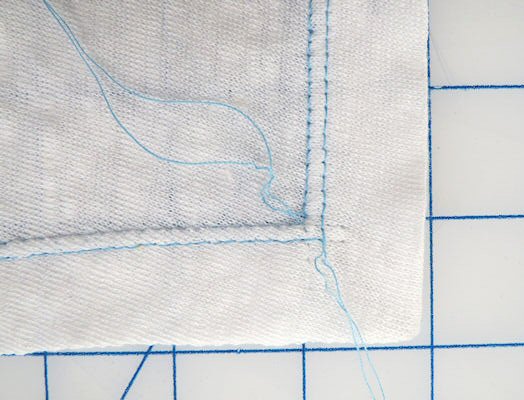 .
.Carefully unpick a few stitches until the inside and outside rows of stitching look like a corner. Take thread tails through to the wrong side of the fabric and knot off to finish.
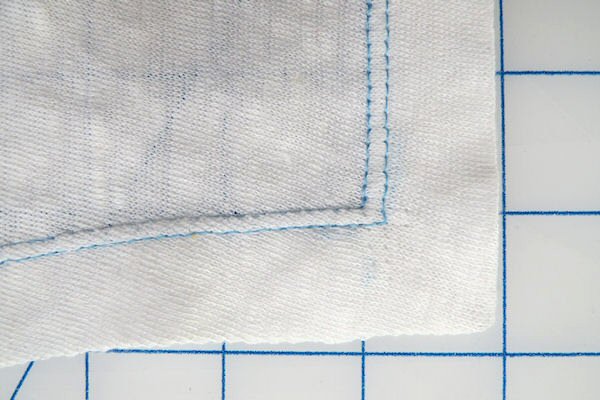
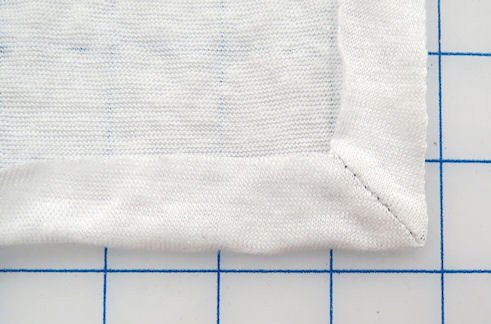
Finished mitered corner with cover stitched hem, right side.

Finished mitered corner with cover stitched hem, wrong side.
Reinforce the shoulder seams with a length of clear elastic. Clear elastic stabilizes the shoulder seams and helps them to keep their shape when pulling the garment over your head. Position the clear elastic on the back shoulder seam allowance and catch the edge of it in with your stitching or serging. Press the seam towards the back of the garment.
 .
.For a funnel neck, where the neck and shoulder seam are sewn as one, insert clear elastic in the shoulder area only.