


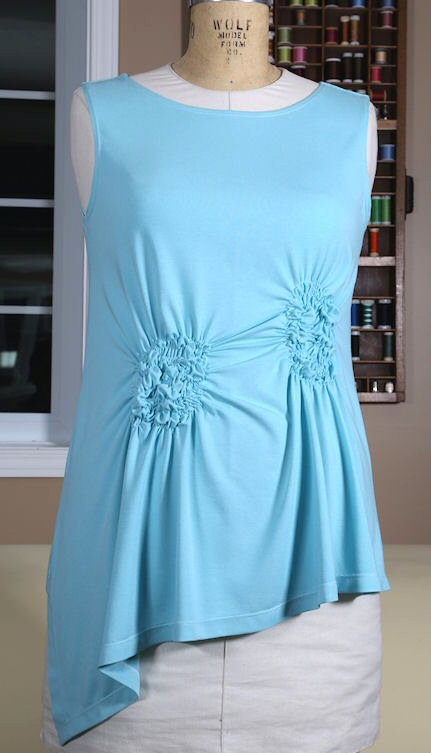
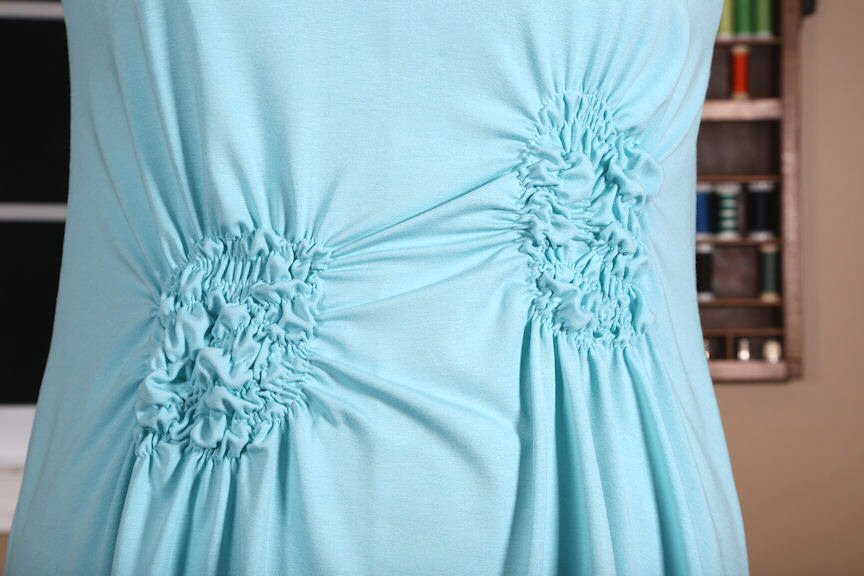
Inspiration garment
The inspiration for this draped top came from one of Linda's favorite ready-to-wear tops. This figure-flattering sleeveless top has a wide neckline, crazy elastic stitching to create gathered "rosettes", a draped silhouette and an asymmetrical hemline. This pattern is partially drafted and partially draped on a dress stand. I made mine sleeveless, like the original inspiration garment, but feel free to add any sleeve you would like. 11 oz jersey had the perfect weight and drape for this project.
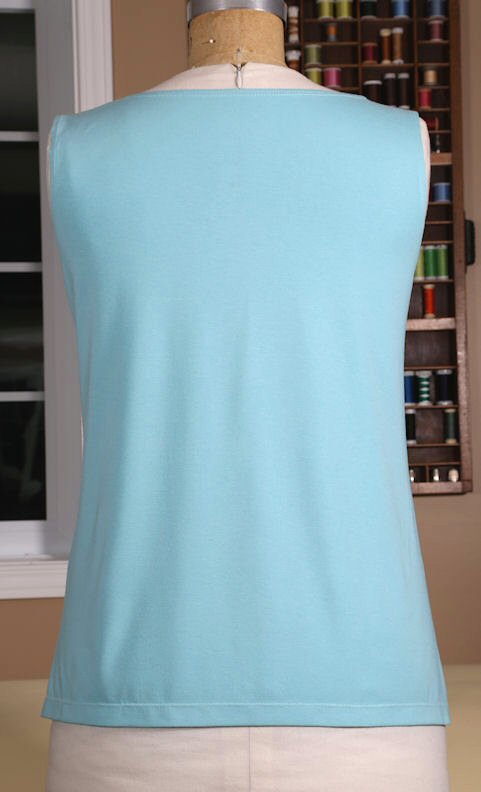
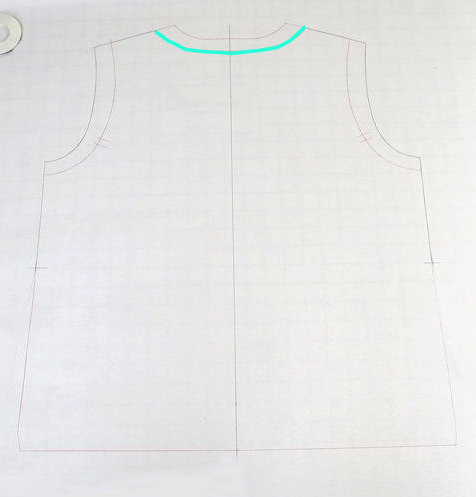
Crazy Stitch Tee Back.
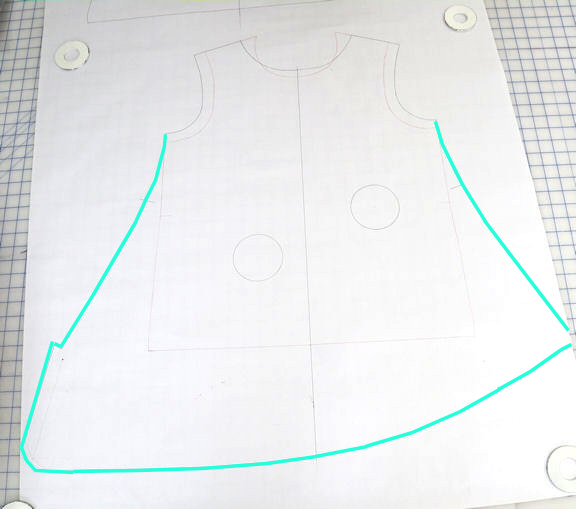
Begin with a traced copy of your Basic Tee pattern draft, using the method described in 'The Basic Tee Pattern'.
The neck and shoulder area of this top are wider than the original Tee pattern. To widen the neckline and create more of a boat neckline, drop the Back neckline 3/4" at center back and widen by taking off 1 1/4" from the shoulder seam at the neck edge.
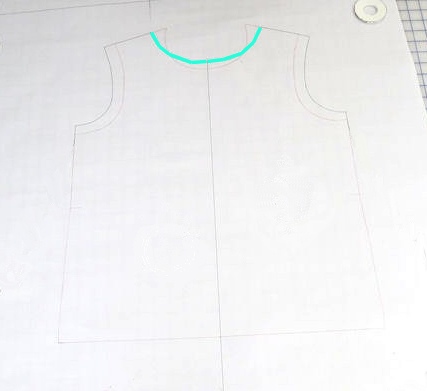
Crazy Stitch Tee Front
Raise the Front neckline 5/8" at center front and widen 1 1/4" at the shoulder to match the back. Redraw the neckline with a smooth curve.

Crazy Stitch Tee Front.
If you are making your Tee sleeveless, extend the length of the shoulder seam 1" at the armhole and raise the armhole 3/4" at the underarm. Redraw the armhole connecting the new shoulder point to the new underarm point.

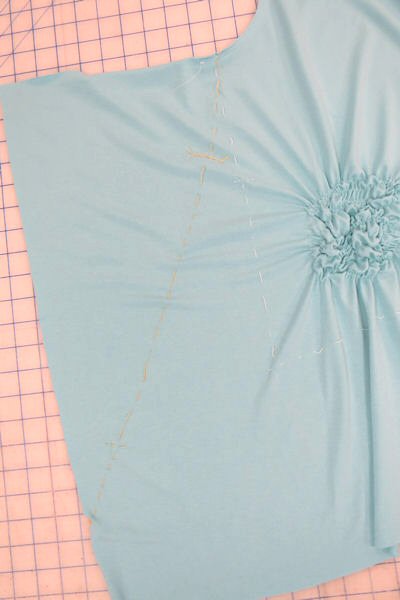
Crazy Stitch Tee with finished shoulder seams, neck and armhole edges. The sides have been left wide to drape. The center front, back and side seams have been thread traced.
At this point the fabric is cut around the neck, armhole and shoulder seams, while the center front, center back and side seams are thread traced along the Basic Tee lines. Leaving 10" extra at each side beyond your thread-tracings, and allowing about 36" for length, cut out the rest of your tee Front and Back.
Sew the shoulder seams and finish the neckline. Finish the armhole edges for a sleeveless tee, or leave them unfinished until later, if you are adding sleeves.
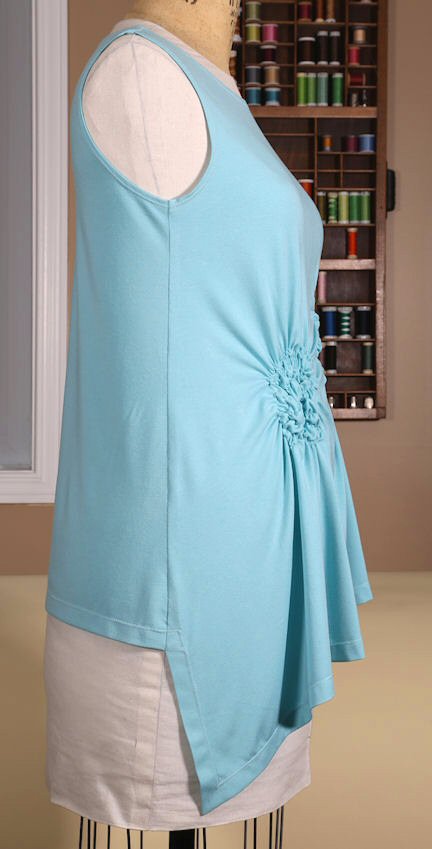
To drape a garment place the shoulder seams on the stand. Align and pin the thread traced center front and center back markings to the center front and center back of the dress stand. Let the garment hang and mark where the crazy stitching should be placed. Place the crazy stitch areas asymmetrically, one below the bust and the other at or slightly below the waist. Complete the stitching using the instructions under Crazy Stitiching.
Once the crazy stitching is complete, put the top back on the dress stand. The crazy stitching will have pulled the fabric in, giving the Front a lot more drape. The crazy stitching may stretch the lightweight jersey making it difficult to pin together with the Back while it is flat on a table. Pinning the Front and Back together on the dress stand may be easier than working with the fabric flat. If you don't have a dress form, perhaps you can enlist a friend to pin the garment on your body.
[Side note from Linda: Rather than draping again after sewing the crazy stitching, I laid my top Front flat on the cutting table, folded at center front, and then I cut out the tee pattern along the original cutting lines of the Basic Tee, as I prefer a more fitted silhouette for my body shape. Kathryn prefers a more drapey silhouette. Either way looks great!]
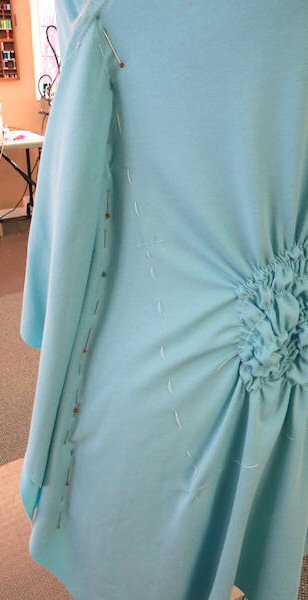
Top has been draped and the new side seams have been pinned.
Allowing for plenty of ease and creating a very loose fitting silhouette, pin the side seams together. Pin a bit of ease into the bust area. Allow extra fullness for the front of the garment and a smaller amount of fullness in the back.
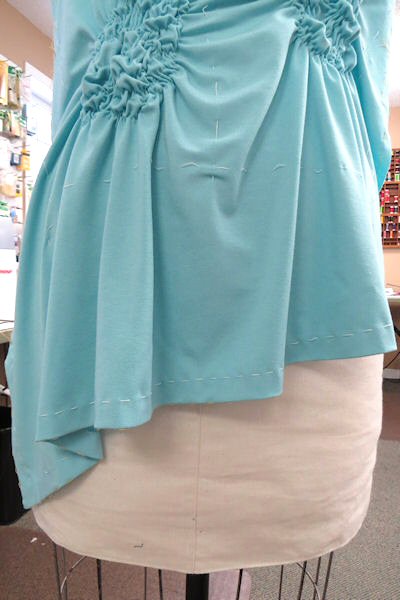
Pin up a new asymmetrical hemline. Remove the garment from the stand.
Thread trace the new side seams and hemline using a different color thread.

Transfer these new lines to the Basic Tee pattern by drafting new lines based on your thread-tracing. This step will allow you to make this top again from a flat pattern, eliminating the need for the draping steps.
As a guideline, these are the amounts that I draped into my garment, but you may make adjustments to suit your body type and desired fullness.
1. Widen the Back hip by 1 1/4". Lengthen the Back by 3 1/2". Redraw the Back side seam curving out from the waist area to join the new hip and hemline.
2. Widen the Front hip by 6" on each side. Lengthen the left side seam to correspond to the Back by 4 1/2". Lengthen the right side seam a total of 7". Redraw the Front hemline with a circular line.
3. Add a new 1" hem allowance to the Front, Back and lower right Front side seam. Create a mitered corner at the lower right Front corner where the side seam meets the hem. All other seam allowances remain 3/8" as are found on the original pattern.
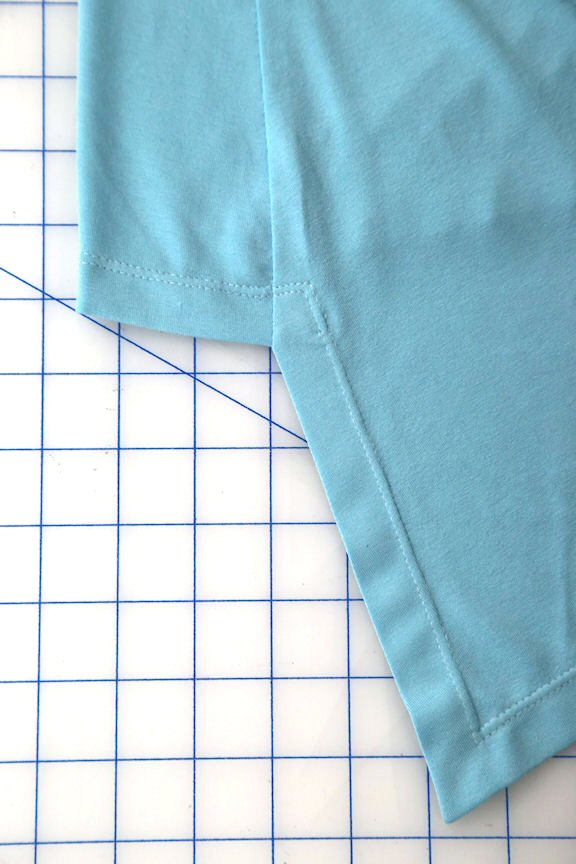
Press up the Back, Front and Side hem allowance before sewing the side seams together. The right hand side is longer than the left and forms a point, creating an asymmetrical hemline, so this step will assure a neat finish at the point. Cover stitch or use a twin needle to topstitch the hem allowance.
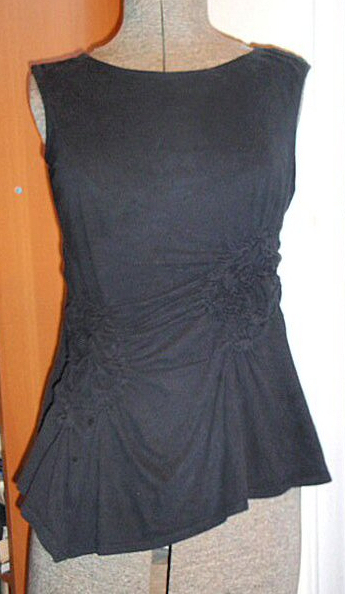
When Linda shared this top with me, I was excited to give it a try. Many years ago as a teenager, I used to make elasticized tube tops by using elastic thread in the bobbin, regular thread in the top and a straight stitch on the sewing machine. Somehow, magically, the fabric was gathered up and quickly became a top. Employing this same technique, I was able to create a similar looking top and pattern for Linda.
This top really needs to be draped on the dress stand and is a work in progress as you complete each step. Different weights of jersey will stretch different amounts and the amount of crazy stitching applied to the Front will vary to suit your preference.
To do the crazy stitching, hand wind elastic thread onto a bobbin. Do not pull the thread too tight. Thread the sewing machine as usual and set it for a straight stitch with a stitch length of 3mm. Practice on a sample first. Try stitching in a random circular shape and then fill in the center. Leave long thread tails, pull threads through to the wrong side of the fabric and knot off by hand to secure. kbtp_dkb56629_1
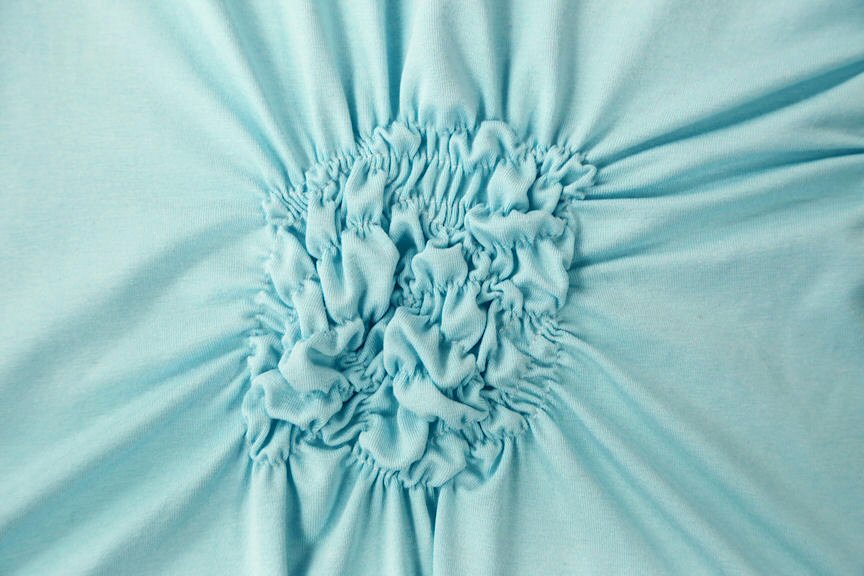
Finished view of crazy stitching from the right side of the garment.
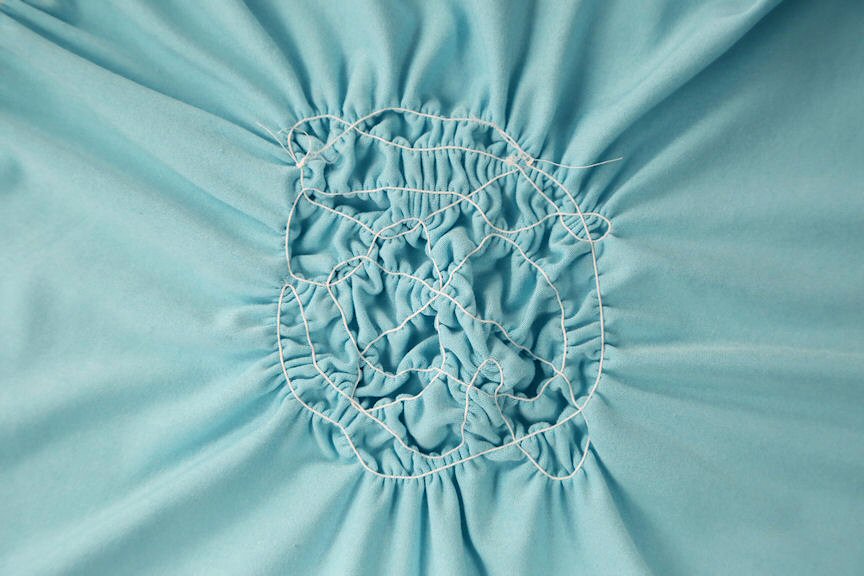
Finished view of the crazy stitching from the wrong side.