


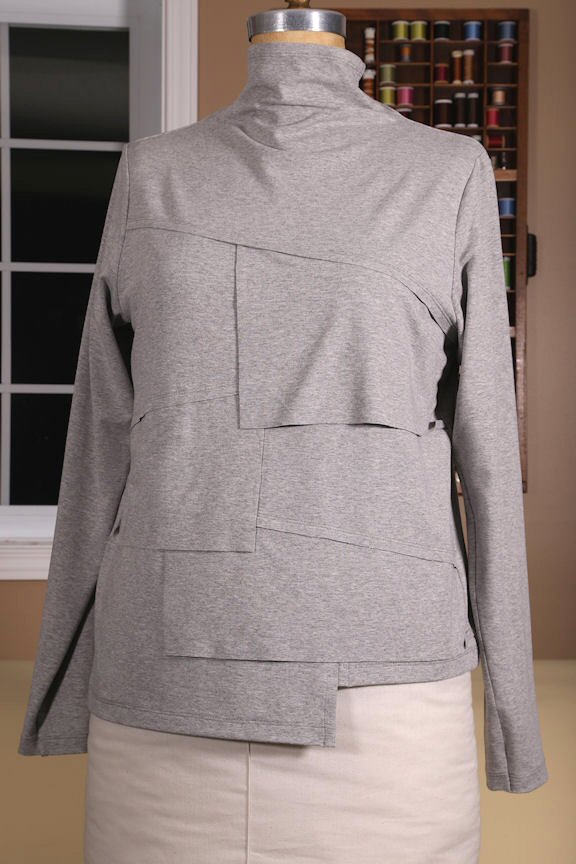
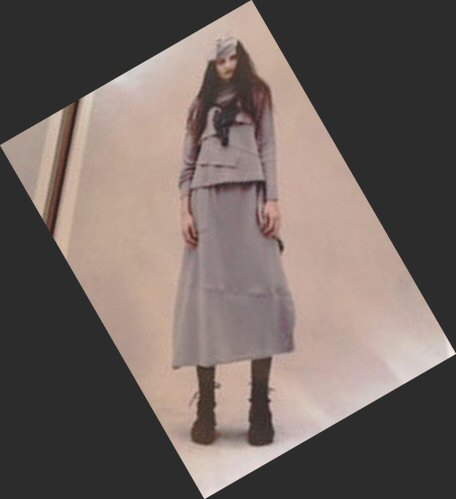
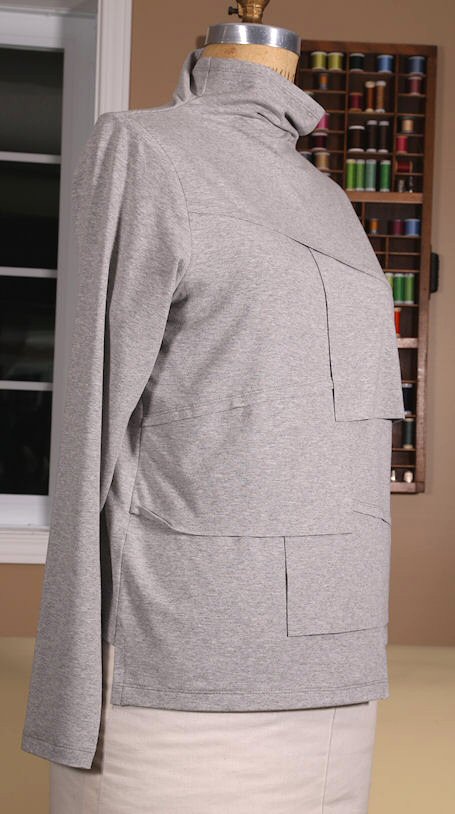
Inspiration garment
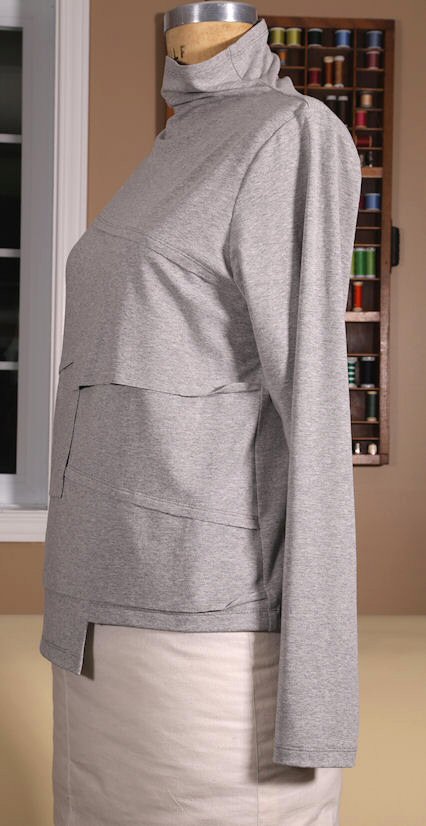
This fabulous layered Tee was inspired by a garment I saw in Paris. With its funnel neck, angled front seaming, irregular-shaped inserts and asymmetrical front hemline, it has a lot of high-fashion detail but is quite simple to construct. 14 oz rayon/lycra jersey was my choice for this project, but 11 oz rayon/lycra jersey would work equally well.
Begin with a traced copy of your Basic Tee pattern draft, using the method described in 'The Basic Tee Pattern'.
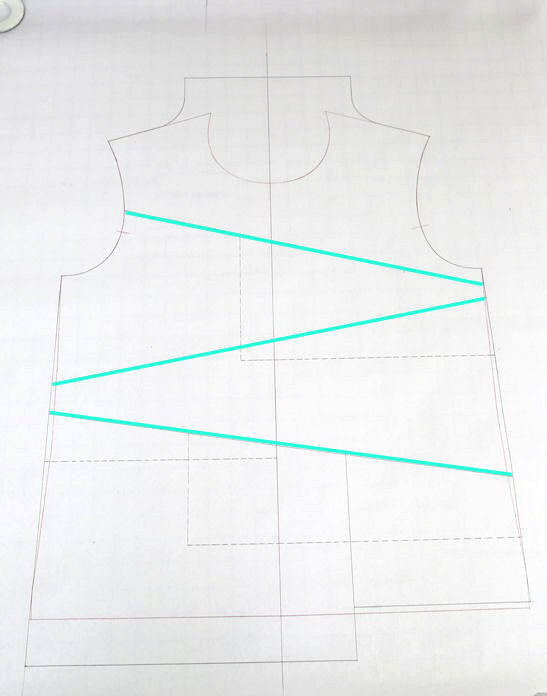
To determine where the new seams should sit, hold the original tissue paper pattern up to your body and pencil in three new seams. The new seams can sit above the bust, under the bust and below the waist. The seam lines are angled, with the upper and lower seams parallel to each other. Draw these new seam lines onto the traced-off white paper pattern.
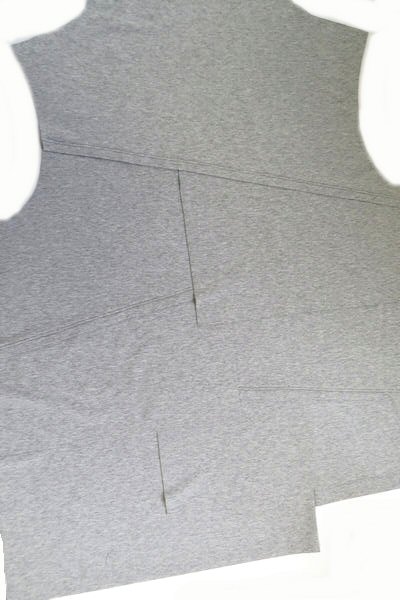
The irregular shaped inserts hang from the new seam lines. Each insert is a different length and width with the upper insert being the longest and the lower insert being the shortest. The middle insert ends at centre front whereas the upper insert crosses centre front by a small amount and the lower insert is approximately two thirds the width of the front. Draw the new inserts onto the pattern Front.
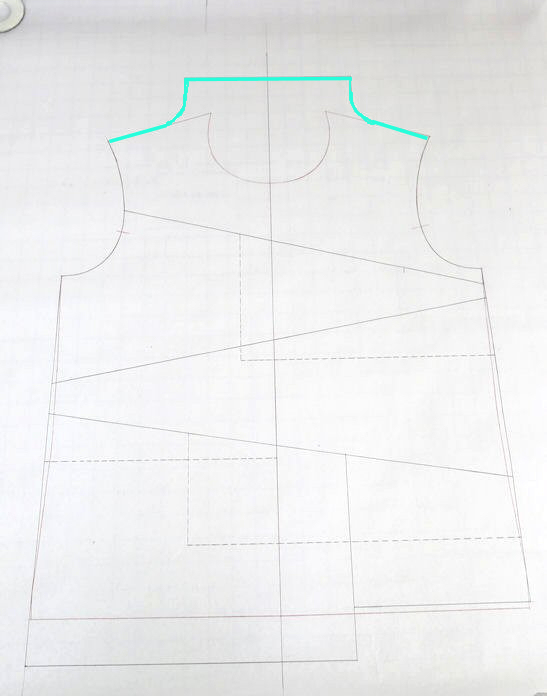
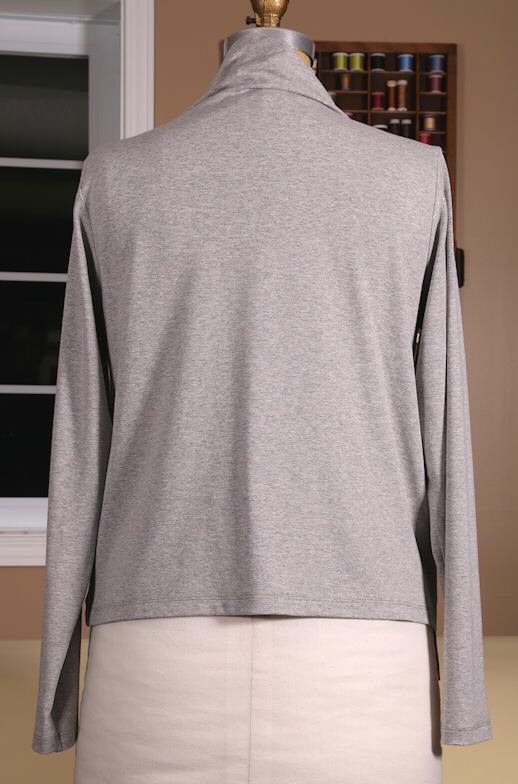
To create a funnel neck, curve the shoulder seams of the Front pattern piece up the desired amount. The funnel neck opening has to be large enough to fit over your head. This measurement will vary depending upon the amount of stretch found in each fabric. The easiest method to test for this is to pin a piece of the fabric into a tube shape and try to pull it over your head. If the fabric is quite stretchy and you would like a closer fitting funnel, the line for the new pattern can extend from the neck point of the shoulder seam. If the fabric does not have a lot of stretch or if a looser funnel is desired, begin curving the new line for the funnel neck part way back from the neck-opening point. Use your curved ruler to create a smooth curve. The lines for the Front and Back shoulder/funnel neck should be identical.
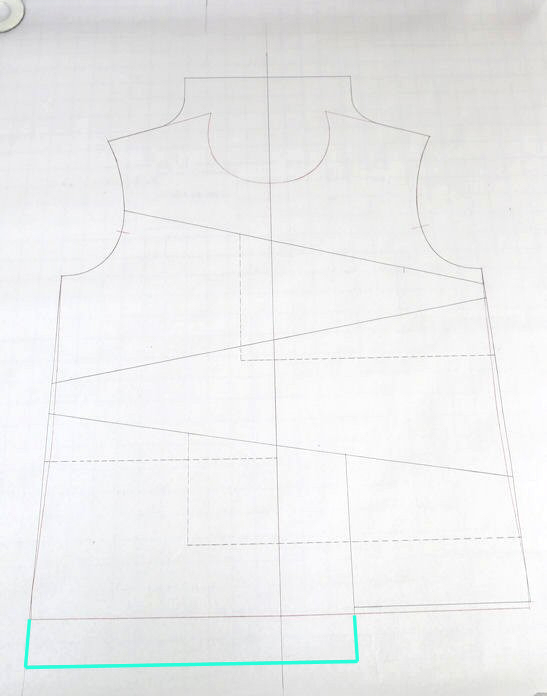
To create an asymmetrical hemline extend one side of the Front to be longer than the other side. Draw another extension line about 2/3 across the width. Draw a straight line from the side seam to meet the extension line at a 90 degree angle.
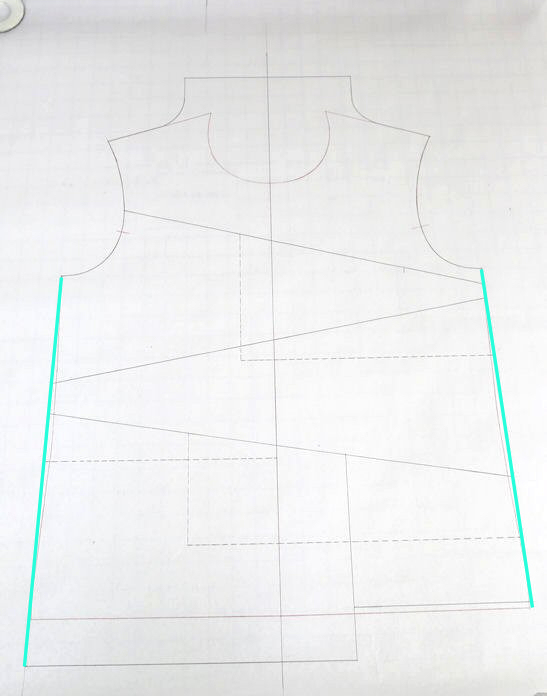
This layered top has more of a boxy silhouette. To obtain this look straighten out the side seams of your basic ee, which may have a bit of waist shaping on the original pattern. To straighten out the seam, lay a straight ruler against the armhole and hip points and draw a straight line to connect the two.
No changes were made to the original sleeve pattern.
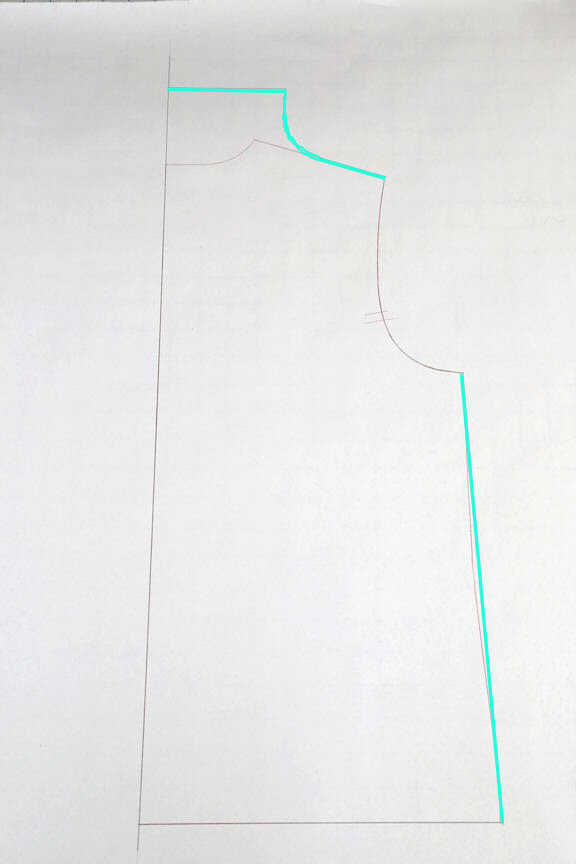
To create the Layered Top Back pattern, simply draw the funnel neck extension and the straightened side seams to match the front.
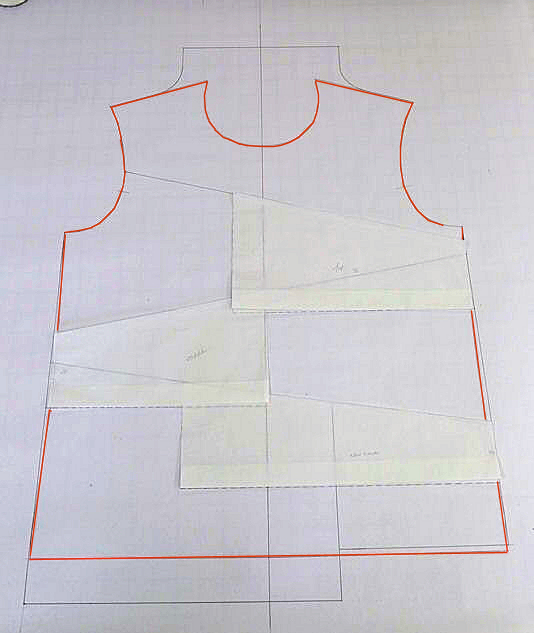
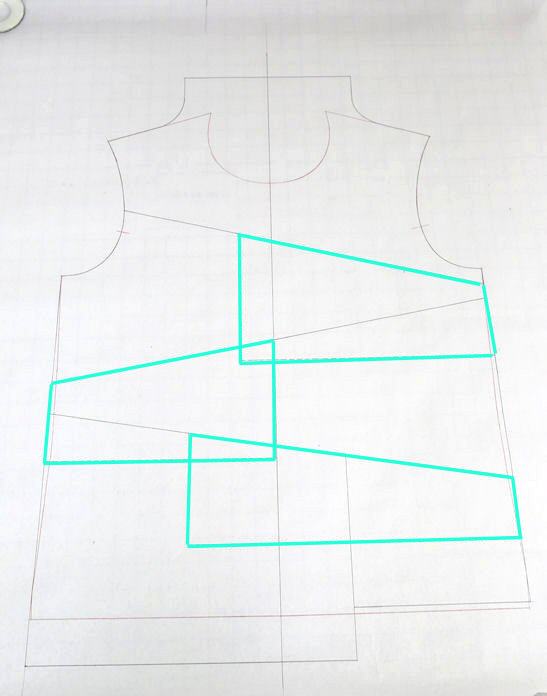
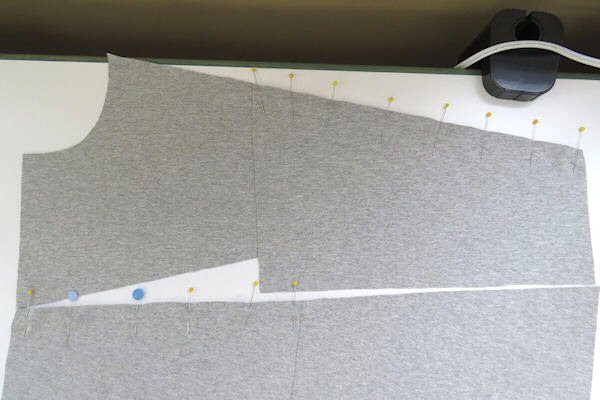
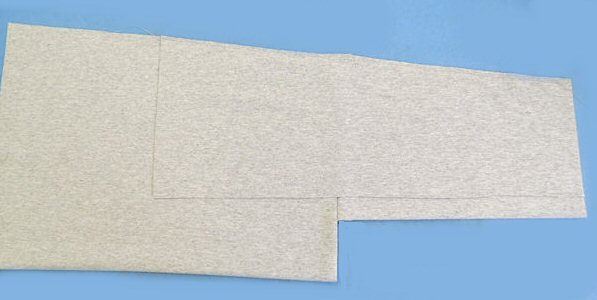
Layered top Front with insert pieces laying over new draft. The original pattern is highlighted in red. The new seam lines are drawn on, the waist shaping has been removed, a short funnel neck and asymmetrical hemline have been added.
Now that the new pattern has been designed it needs to be turned into pattern pieces. Part of the process of creating new seam lines and pattern pieces is determining how the garment will be sewn together and how the seams, hems and edges will be finished. This involves doing a few samples to test out ideas and then deciding which are best suited to the fabric. For the layered top, I wanted to leave some edges raw and let them curl when the garment was washed. By sewing a few samples and throwing them in the washing machine you can determine how much your fabric will shrink and if it will curl along the edges. The fabric that I used curled easily on the crosswise grain when washed, so I incorporated a curl allowance into the edges of the pattern pieces that would be left raw.
All of the new seams require seam allowances. To do this, first duplicate each new pattern piece that has been drawn onto the original draft by pinning tissue paper to the draft and tracing off the new pattern pieces. Leave enough paper around each tracing to add seam allowances. Don't forget that your original Basic Tee pattern already has seam allowances at the sides, shoulders and armholes so no extra seam allowance is required in those areas.
*Note: If you are unsure of the fit, increase your side and sleeve seam allowances to 1" (so if you are using a pattern with 3/8" seam allowances, you would add an extra 5/8", to equal 1" total). After fitting, trim away any excess that is not required.
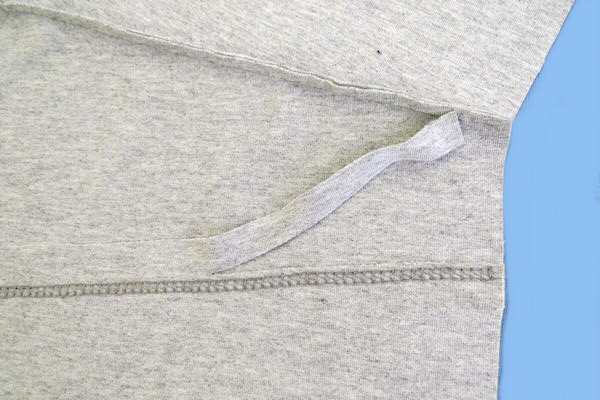
The upper edges of the inserts need a 1/2" seam allowances to accommodate the lapped seaming method that will be described later. The vertical loose edges of the inserts have no seam allowances. For the lower edges of the inserts add a 1" hem allowance, which will be left raw to curl.
The angled seams of the Front also need 1/2" seam allowances to accommodate the lapped seaming method. I added a hem allowance of 3/4" to the new Front hemline as well as to the Back, which lengthened the Tee from the original design. Your seam allowances may differ from my Basic Tee Pattern, so just be sure to match the seam allowances of your chosen basic pattern.
Be sure to mark each pattern piece clearly as you go, so that there's no confusion after you cut out all of your pattern pieces.
The front of the layered top is assembled in sections and then joined together with the back and sleeves. There are four sections of the top Front: Top Front, Upper Front, Middle Front and Bottom Front.
First lay out and pin the upper and middle insert pieces together with their respective Front sections.
Baste the upper and middle insert layers together with their respective Front sections. The vertical edges of the insert pieces are left raw.
Since the Bottom Front consists of two sections, these need to be assembled before attaching the insert layer. First press up the hem allowances of the two Bottom Front pieces before seaming them together. Sew seam with a 3/8" seam allowance and press open.
Baste the bottom insert to the prepared Bottom Front.
Chalk a 1" placement line along the bottom edge of the wrong side of the Top Front, Upper Front and Middle Front sections.
Place the right side upper raw edge of the Upper Front section along the chalked line on the wrong side of the Top Front section.
Baste close to the raw edge.
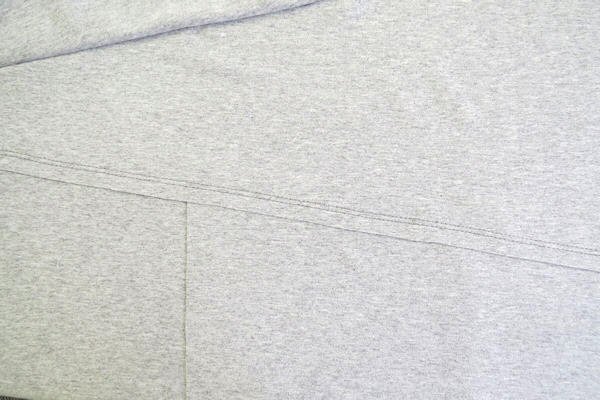
Cover stitch or use a twin needle to topstitch 1/2" from the raw edge on the right side of the fabric. Make sure that needle next to the raw edge is positioned 1/2" inch away from the edge with the second needle actually stitching further away from the raw edge.
From the wrong side trim away excess fabric close to stitching.
Attach the Middle Front to the Upper Front, and the Bottom Front to the Middle Front using the same method as above.
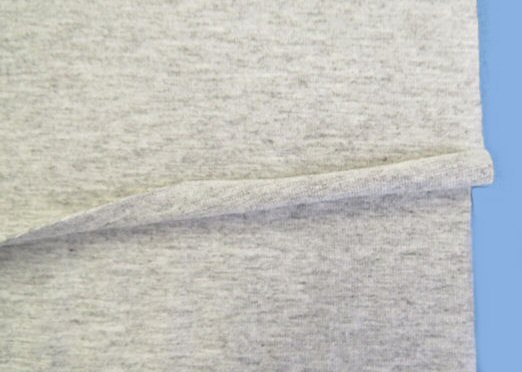
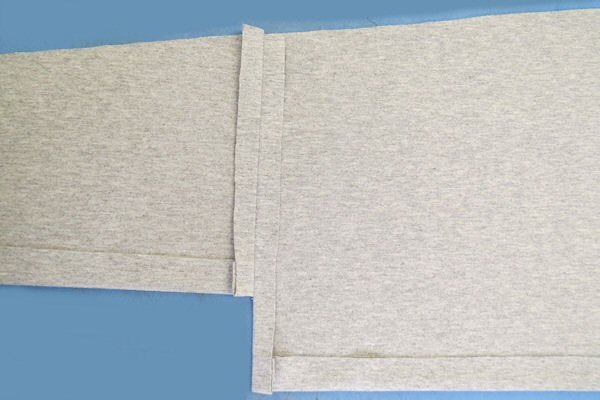
After washing the raw edges will curl. From the test samples, it was determined that the unfinished edges would curl up to 1", so before sewing the side seams together, curl the lower raw edges of each insert, baste it into the seam allowance and then sew the Front and Back together with the curled edges caught into the seam.
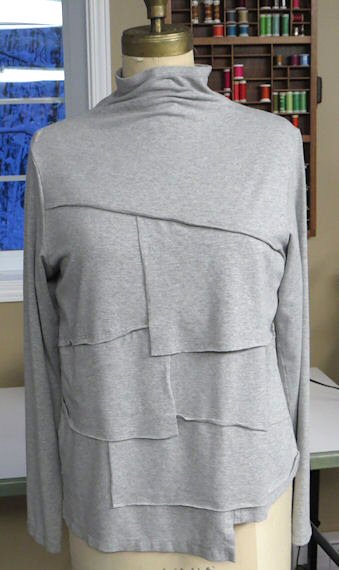
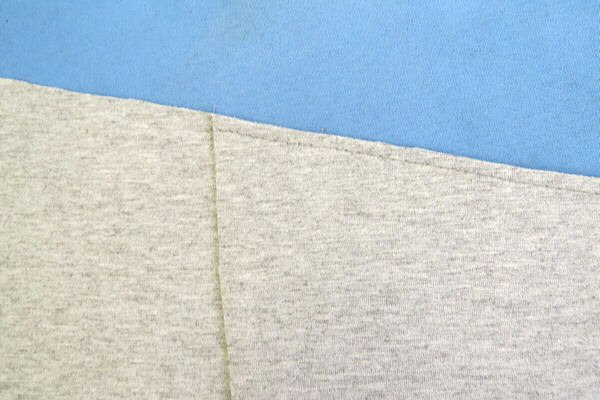
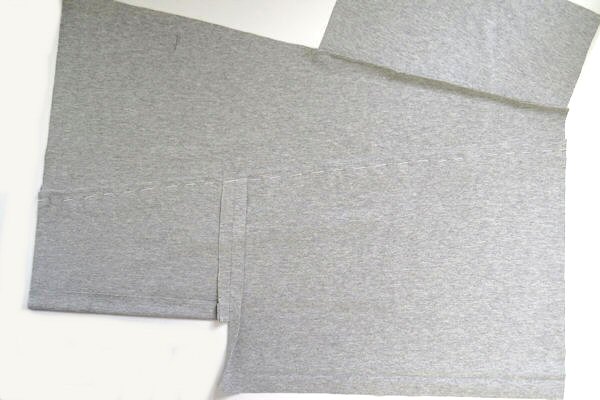
Layered T-shirt after it has been washed.
After the shirt is complete wash it in the washing machine, dry in the dryer for a few minutes and then hang to finish drying. The raw edges will curl up and take on a distressed look once dry. kbtp_dkb56625_1
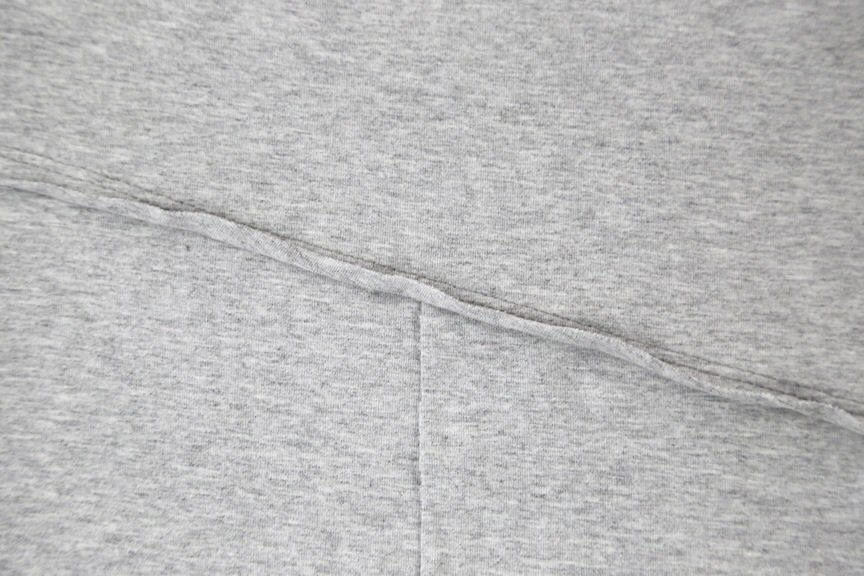
Seam detail of the layered T-shirt after it has been washed.