
Brocades: Day to Evening Elegance
by Kathryn Brenne
by Kathryn Brenne


Welt Pocket Primer
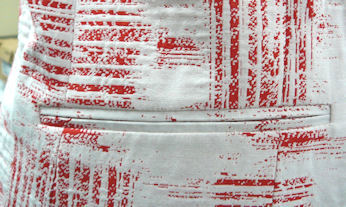
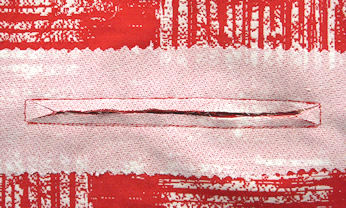
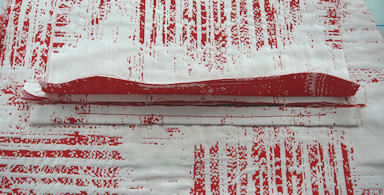
Finished pocket outside
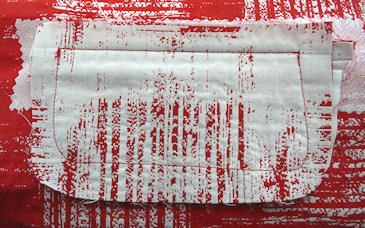
Finished pocket from the inside
This technique used by Jon Moore creates perfect welts easily! Accuracy in measuring is a must so take your time and the end results will be rewarding.
- Chalk the outline of the pocket opening. Interface the pocket area. Using a small machine stitch of 1.5 - 2 mm stitch around the outline. Start stitching in the middle of a side rather than in a corner. Stitch around the opening and overlap your stitching instead of backstitching.

Chalk welt pocket opening and stitch with a short stitch length
- Prepare the welts. The welts should be cut double the width of the pocket opening. For my pocket the opening was 3/8" wide. I cut the welts 3/4" wide. The length of the welts should be the length of the pocket opening plus 1 1/2". Use a rotary cutter and ruler to accurately cut the welts. Interface the welts, fold exactly in half wrong sides together and press.

Prepare welts with interfacing, press in half
- Accurately chalk the center of the pocket opening. I used yellow chalk for photography purposes but white chalk is suitable for most fabrics. Test to make sure it brushes off of your fabric without leaving a mark.
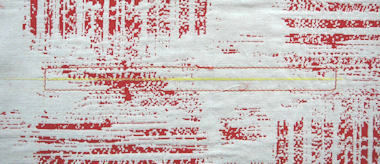
Chalk center of opening
- Pin the raw edges of the welt to the center chalk line.
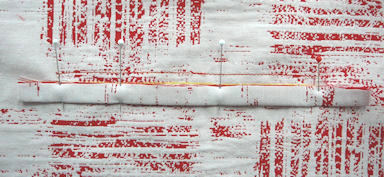
Pin welt with raw edges
along center chalk line
- From the wrong side of the garment, baste just inside the stitching line through all layers. Begin and end basting precisely at the corners of the stitched box. The welts should look even on the right side once the basting is complete.
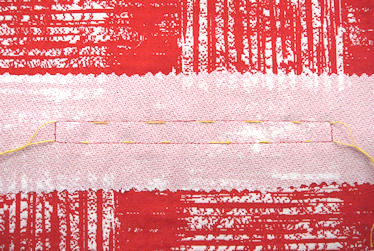
Welts are basted in place (wrong side of fabric) using machine stitching as a guide
Basting will show through on the right side
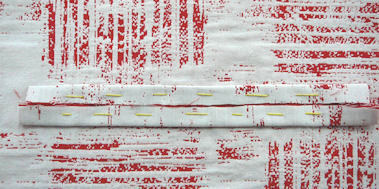
- Machine stitch from the right side using the basting threads as a guideline. Start and end precisely.
Sewn welts
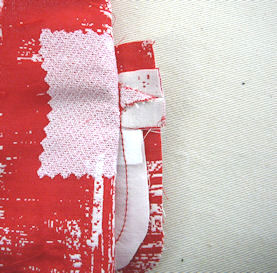
- From the wrong side cut open between the two rows of stitching and V into each end. The Vs should be at least 1/2" long. Clip the Vs right to the end of the stitching but not beyond it.
Cut through and V ends
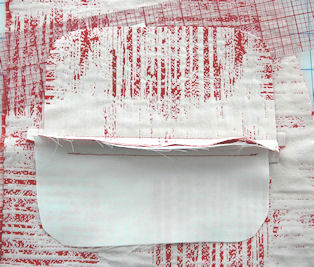
- Pin the pocket facing in place right sides together with the welts. I have pinned the red as the right side for photography purposes. From the wrong side stitch over the previous row of stitching, which will hold the facing in place.
Position pocket facing and sew
Sewn pocket facing
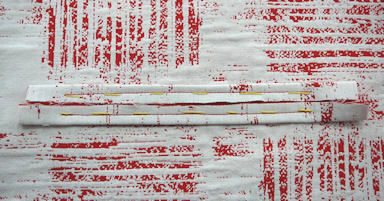
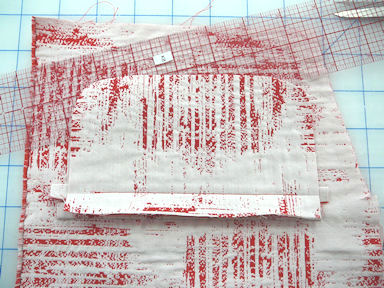
- Pin the pocket lining to the other edge and stitch in the same manner. Turn the welts, facing and lining all through the opening. Press.
Pin pocket lining in place and sew
- Catch stitch the edges of the welts together. For my jacket I knew that I would never use the small pockets and I didn't want them to gape open when I wore the jacket. So, I catch stitched them on the inside using a fine silk thread that would not show. If the pockets will be opened and used, catch stitch them on the outside and remove the stitching once the garment is finished.

Catch stitch on wrong side
(can also be done from right
side and then removed)
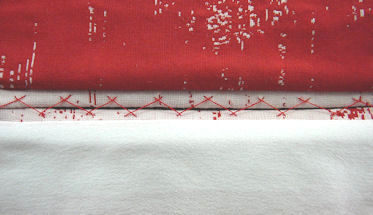
Close-up view
- Lift the garment out of the way and backstitch across the Vs through all layers and around the pocket bag.
Sew across the V ends and
around the pocket bag
Finished pocket outside
Finished pocket from the inside
Copyright (c) 2018 by EmmaOneSock