
by Kathryn Brenne


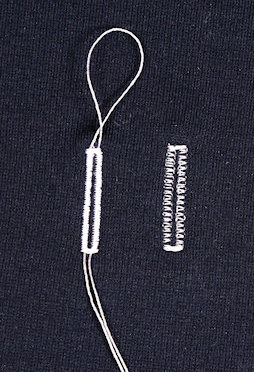
corded buttonhole
and stretch buttonhole
Machine buttonholes work well on Ponte fabric. Fuse a piece of bias knit interfacing to the area first. Use a stretch buttonhole setting. If your machine does not have a stretch buttonhole setting, use a corded buttonhole to prevent it from stretching. I use Gutermann Buttonhole twist as the cording.

preparing welts
Bound buttonholes are suitable for a Ponte garment and can become a design element in a color blocked garment. To make a bound buttonhole follow these steps:
Interface the buttonhole area of the garment with a strip of bias knit interfacing. Pink the edge that will sit into the garment.
To make the lips for the buttonhole, cut a 1 1/2" wide strip of fabric long enough to create all of the buttonholes. Interface the strip with a piece of bias knit interfacing. Press the strip in half wrong sides together. Accurately chalk a line 1/4" away from the folded edge of the fabric. Using a rotary cutter, trim the strip to an accurate 1/2". The chalk line will now be centered in the middle of the strip. Cut the strip into pieces that equal the finished length of each buttonhole plus 1".
chalk size of buttonhole
Mark the buttonhole placement on the right side of the garment using either chalk (test first to make sure it does not leave a mark) or thread trace using cotton basting thread. For the lips that we have created the finished width of the buttonhole will be 1/2".
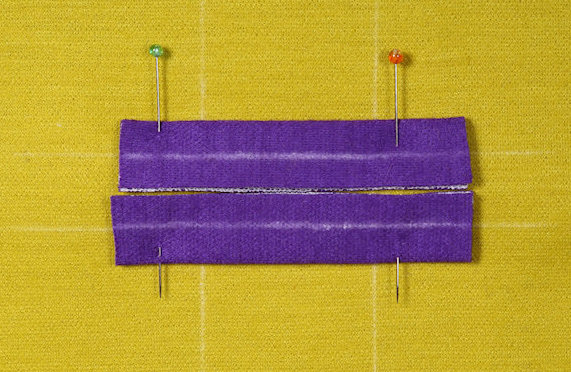
pin welts together,
cut edges towards center
Pin two lips to the fabric with the cut edges touching each other and the folded edges facing outward. Accurately stitch along the chalked lines of the lips starting and ending precisely at the marked ends of the buttonhole.
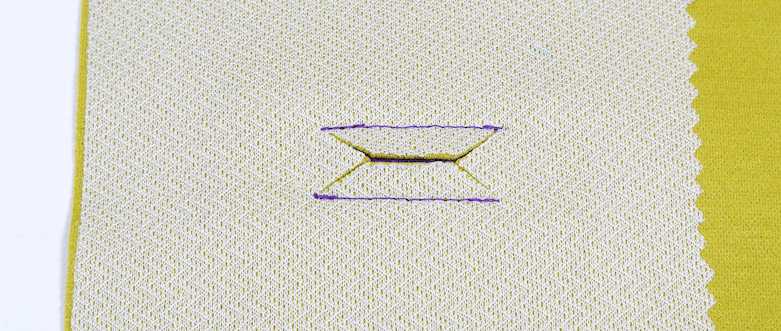
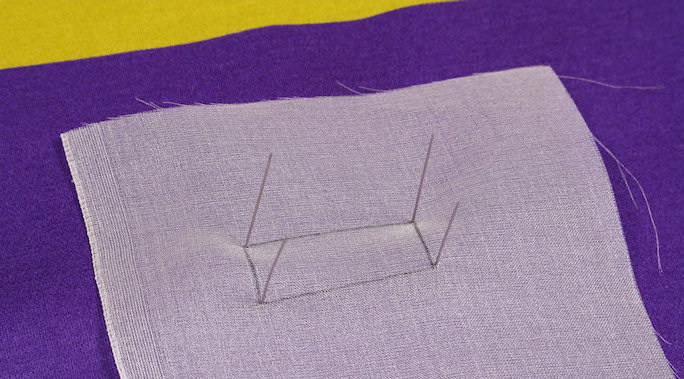
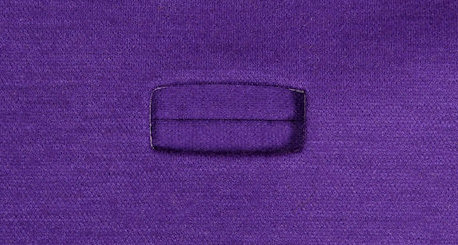
cut through and V into corners
From the wrong side of the fabric, cut down the centre of the stitching and V into the corners.
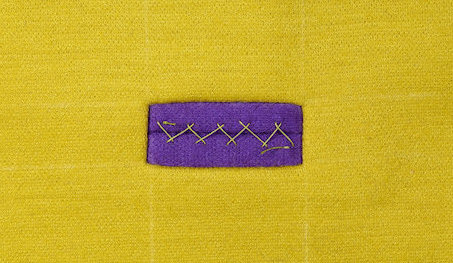
cross stitch together for pressing
Turn the lips through the opening. Cross stitch the lips closed by hand to hold in place. Press using a press cloth on the right side of the fabric. On the wrong side, stitch across the V ends.
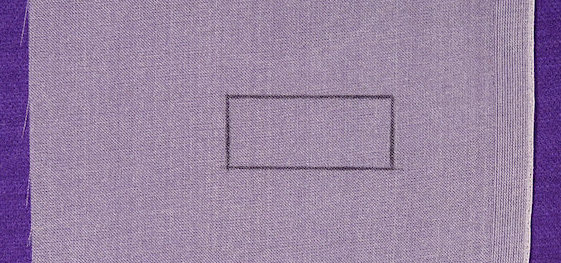
draw opening on organza with pencil
pins coming through to mark buttonhole
placement and holding organza in place
Fuse a piece of light weight tricot knit interfacing to the facing. Attach the facing to the garment. Mark the position of the buttonholes on the facing by pushing pins through each corner of the buttonhole from the right side of the garment through to the facing. Mark the finished size of the buttonhole onto a square of silk organza using a lead pencil.
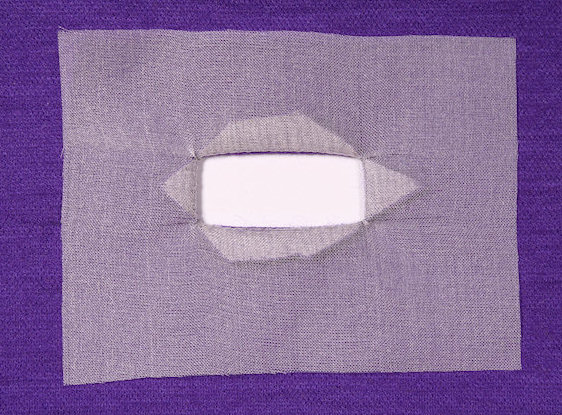
organza window
faced organza window sitting on
back of bound buttonhole,
ready to be hand stitched into place
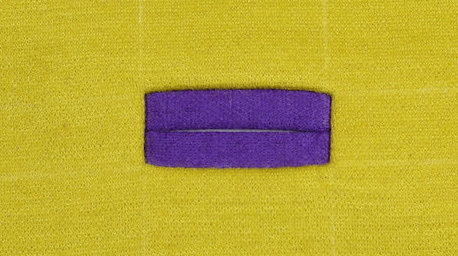
finished bound buttonhole
Place the outline on the organza over the pins that are marking the buttonhole placement. The organza will be sitting on top of the right side of the facing. Pin it to the right side of the facing. Using a short stitch length of 1.5mm and starting on one of the long sides, stitch around the marked rectangle, attaching the organza to the right side of the facing. Cut down the center and V into the ends. Turn the organza through to the wrong side of the facing. Press so that no organza is showing on the right side of the facing. You have created a faced window, which can now be hand sewn to the back of the bound buttonhole.
Give the buttonhole a final pressing. Place the garment on a wooden board (a pressing block works well, but any clean hard wood cutting board will do), cover with a press cloth. Press using a bit of steam. Clap the area well using a wooden clapper. Anytime you press against wood you will get a very flat finish. Remove cross stitches.