
by Kathryn Brenne


Hand worked buttonholes are one of the hallmarks of a couture garment. Practice a few buttonholes first before working the buttonholes for the garment. The technique that I use is a slight variation on the classic hand-worked buttonhole but it is easy to do and provides a good result.
Some jackets are worked with a hand-worked buttonhole through the garment fabric only (and interfacing if used), and finished with a bound buttonhole on the lining. I modified this method for the front of the jacket and the pocket buttonholes and used a Spanish Snap buttonhole rather than a bound buttonhole as it is easier to sew. For the sleeve vents I made hand worked buttonholes through all layers, eliminating the need for a bound or Spanish snap buttonhole on the small sleeve vent lining.
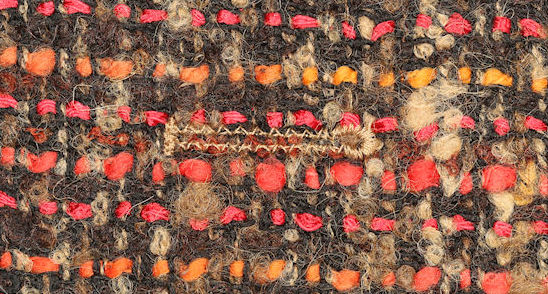
Machine 'basted' buttonhole
Machine stitch a keyhole buttonhole using a narrow stitch width of 6mm and a long stitch length of 1.7mm, with the eyelet of the keyhole toward the center front. I consider this a basted buttonhole, which will hold the layers together and prevent the edges from fraying. Cut the buttonhole open and use a small eyelet punch or awl to cut the eyelet.
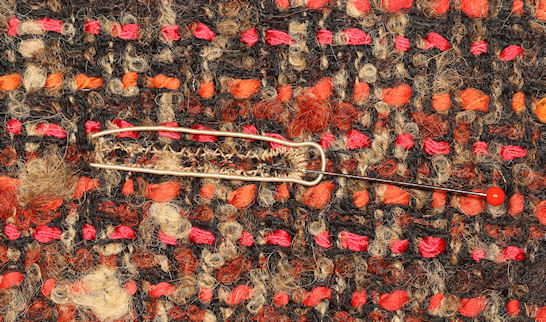
Gimp being held in place with a pin
Gimp reinforces and strengthens the edges of the buttonhole. Cut an 8" length of gimp. Use a large-eyed darning needle to thread the ends of the gimp through the end of the bartack to the wrong side. I crimp the gimp to give it a better shape around the eyelet. A pin through the end of the eyelet will help to hold the gimp in place while you buttonhole stitch over it.
Wax a length of silk buttonhole twist and press with the iron. Depending on the size of the buttonhole approximately 40" should be enough thread to make one buttonhole. You do not want to run short but on the other hand if the thread is too long it may begin to shred. With the keyhole aligned to the left, I begin my buttonhole at the lower right end. Come up from the wrong side of the fabric.
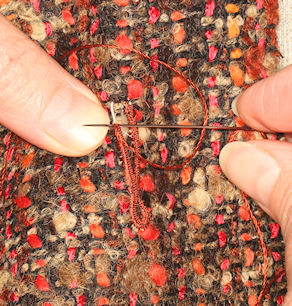
Inserting the needle under the edge using thumbnail as a guide.
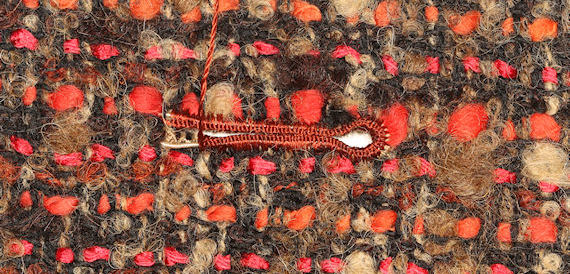
Throw the thread to the left. Insert the needle under the open edge coming out at the outer edge of the basted buttonhole. The basting will serve as a guideline, helping to keep your stitches even. I place my thumbnail where I want the needle to come out. My thumbnail also serves as a guide to keep the stitches straight. Wrap the thread around the pointed end of the needle and pull through. As the thread pulls up it will create a knot, which is called a purl stitch.
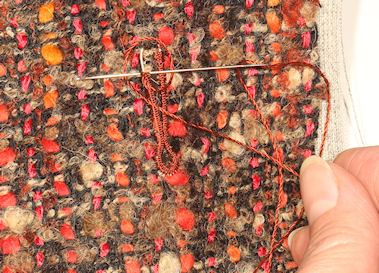
Wrapping the thread around the needle in the direction that you are travelling.
Pull the thread up and away from you to position the purl stitch so that it is laying slightly towards the front of the buttonhole. Stitches should be positioned close enough together that no fabric or gimp shows. Work your way around the buttonhole fanning the stitches out around the eyelet.
Partially completed hand worked buttonhole over gimp strand.
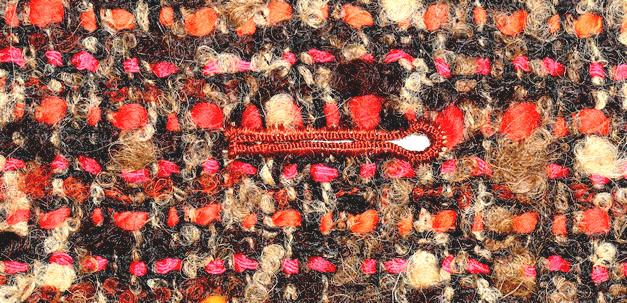
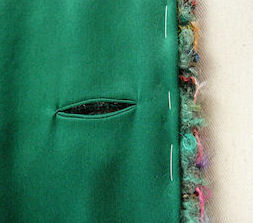
Finished hand worked buttonhole.
Catch-stitch edges of buttonhole closed and lightly press.
Work three stitches across the end of the buttonhole as a bar tack. Work 5 buttonhole stitches over the bar tack. Pull on the gimp slightly to tighten up the buttonhole and even out the stitches. Take the needle to the wrong side of the fabric and oversew the ends of the gimp before cutting them off and ending off the thread.
Catch-stitch the buttonhole closed. Press lightly, covering with a press cloth.
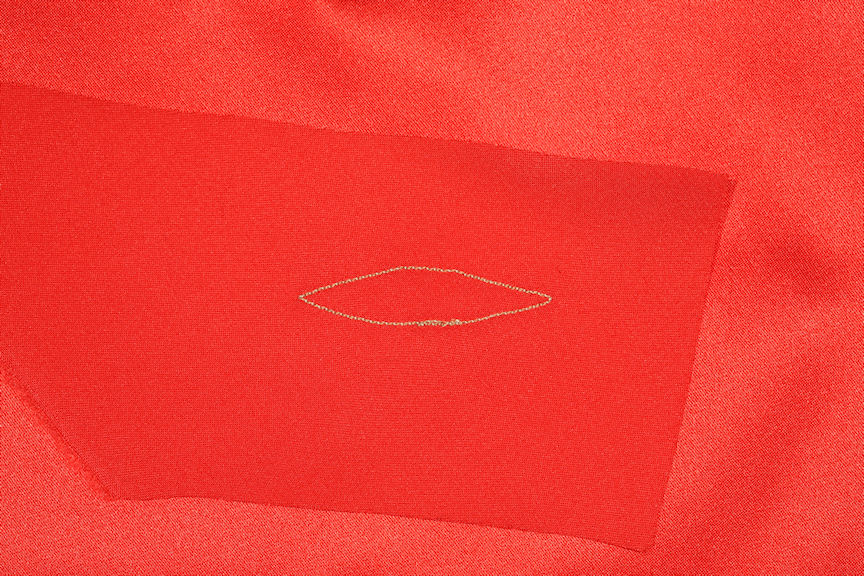
An easy method to neatly finish the lining side of the buttonholes is to use the Spanish snap technique. Push pins
through from the right side of the garment to the wrong side to mark the position of the buttonhole on the lining fabric.
Cut a strip of bias lining fabric 2" wide. Position a length of the bias over the area of the buttonhole right sides of the
fabric together. Beginning in the center of the buttonhole machine stitch a football shape through the bias and the lining.
Use a stitch length of 1mm. Do not backstitch. Overlap the stitching when you
come around.
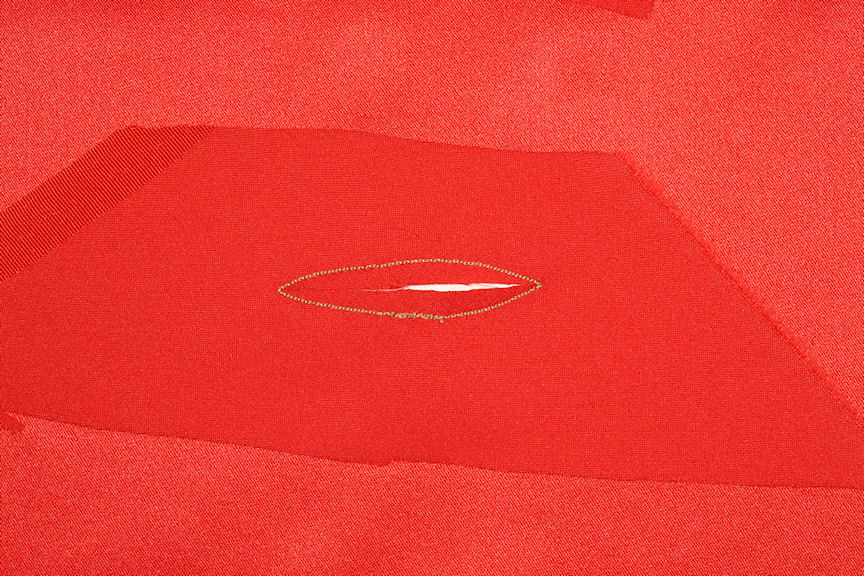
Using small, sharp scissors cut down the center of the opening. Turn the bias through to the wrong side of the lining.
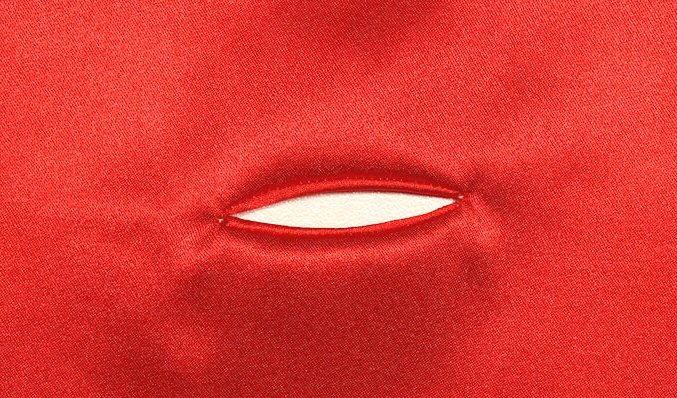
Snap or pull on each end of the buttonhole. Two narrow lips will form. Carefully steam the lips. You do not want to flatten the lips, just coax them to stay put. Trim the outer edges of the bias to an oval shape.
I tacked the bias to the hair canvas interfacing of the garment to hold the lining buttonhole in place.
Close up of Spanish snap buttonhole and lining basted in place.