
by Kathryn Brenne


Building trims can be a creative exercise that can change the look of your jacket. Trims are usually hand sewn to the garment once it is almost finished. This allows you to change the trim on your jacket in the future if styles change or you tire of the look. Here are a few trim ideas to get you going.

Grosgrain ribbon shaped with a running stitch.
Grosgrain ribbon can be shaped to fit a neckline. Look for ribbon made of cotton, silk or rayon with tiny scallops along the edge. Polyester ribbon will not shape. Narrow ribbon is easier to shape than wider ribbon. This sample is 5/8" wide and was quite easy to shape. To do this, run a small gathering thread by hand along one edge of the ribbon. Using your pattern as a template pull up the gathering thread so that the ribbon fits the neckline. Using steam and a clapper, shape the ribbon to fit the neckline.
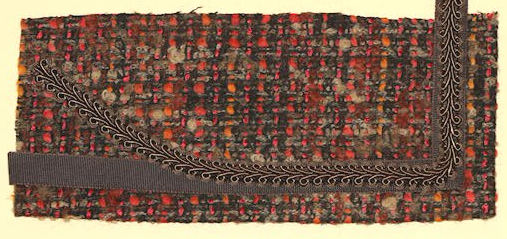
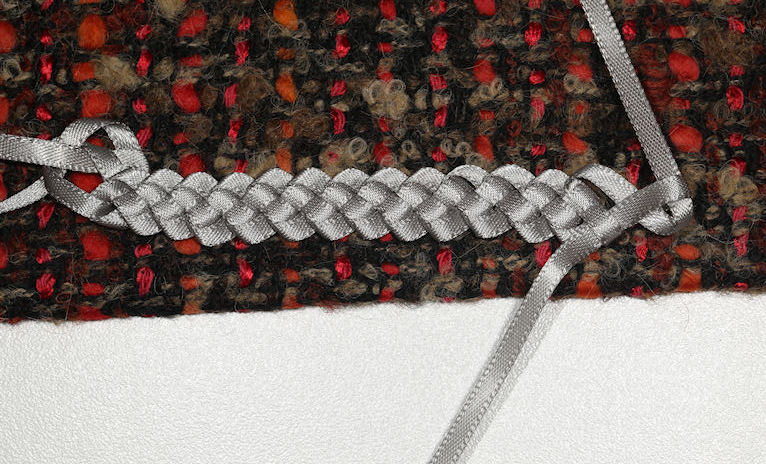
Braid framed with grosgrain behind.
Although either grosgrain ribbon or braid can be used on their own as a trim, try combining the two to create one trim. In this sample the grosgrain ribbon frames and sets off the plain braid. First baste the braid to the ribbon, and then hand-stitch the braid to the ribbon along each edge. Baste the grosgrain ribbon to the garment and then use a fell stitch to hold in place.
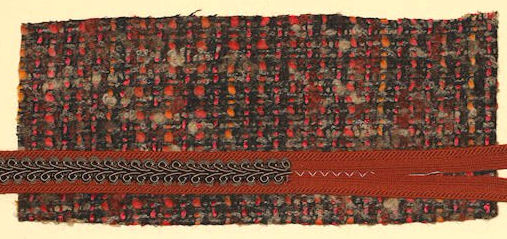
Wool insertion trim as backing for the braid.
This wool insertion trim in a contrasting colour creates a nice backing for the braid. Overlap the two edges of the trim slightly and use a wide zig zag to sew down the center. Lay the braid over the zig zag and baste to hold. Hand-sew the braid to the insertion. Baste the combined trim to the garment. Hand-stitch to the garment along each edge.
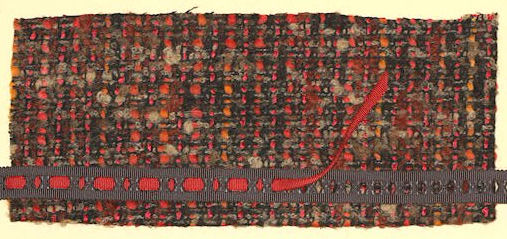
Novelty grosgrain ribbon.
I found this novelty grosgrain ribbon with holes in it. I was able to thread 1/4" grosgrain through the holes. Try skipping a few holes to create your own pattern. Shape the ribbon, baste and sew to the garment.
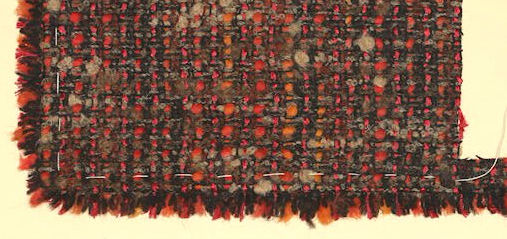
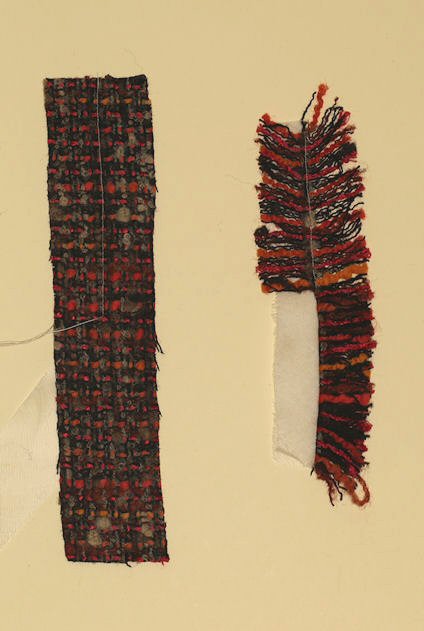
Fabric selvedge used as trim.
The selvedge of this tweed was suitable to be used as a trim. I cut the selvedge off leaving approximately 3/4" of fabric to be used as an insertion. Turn back the edges of the garment. Baste the selvedge to the garment so that just the fringe shows. Hand sew the fabric edge of the trim to the garment. The lining will then be sewn to the garment with the selvedge sandwiched in between. Check to see if both selvedges are equally nice and consider purchasing extra fabric if you decide to use selvedge as trim.
Sew down the centre of the fabric strip attaching it to the organza. Press the fringe to one side and the organza to the other.
I came up with this technique several years ago when I made a silk tweed jacket. Try fringing a bit of your fabric. You will find that one direction may have nicer fringe than the other. Cut strips of fabric in the direction you want to fringe, either the true crosswise or true lengthwise grain of the fabric. Be sure to allow extra yardage when purchasing your fabric if you wish to create this trim. Strips are cut twice the finished width of the trim. Cut bias strips of organza 2" wide. Center the fabric over the organza and sew the two layers together down the center using a stitch length of 1mm. To reinforce the stitching and prevent the fringe from pulling out, stitch over the first row of stitching a second time. Fringe the fabric back to the stitching line on either side. Press the organza strip back on itself and the fringed fabric back on itself. This will give you a double layer of fringe, which is nice and thick and a double layer of organza which can be used as insertion and sandwiched between the garment and the lining. The fringe can be evened out or trimmed using a rotary cutter and ruler.
This braid technique was inspired by the gum wrapper bracelets we used to make as kids. Use two lengths of 1/8" satin ribbon. Make a loop by folding the ribbon back on itself. Insert a loop from the second length of ribbon into the first loop. Pull the first loop tight. Continue in this manner inserting one loop into the other. Try using different coloured ribbons to create another look. Baste the trim to the garment or layer it as above onto insertion or grosgrain ribbon. Hand-sew in place.
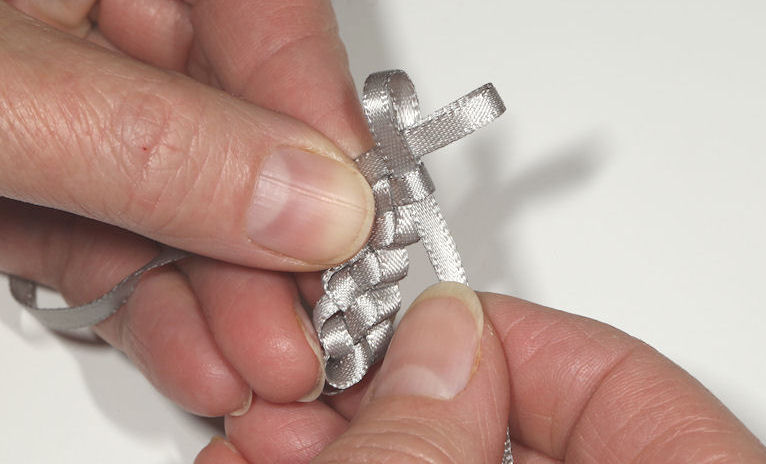
Make two loops, insert one loop into the other, snug up the ribbon, then ....
....make a loop in the ribbon that was just snugged up and insert it into the open loop, snug and repeat.