
by Kathryn Brenne


One of the main concerns of sewing leather is that you cannot make a mistake and unpick stitches without leaving a hole. To prevent this, make sure to test your sewing machine set-up and stitch length on lots of samples first before beginning your project.
Regular seaming is suitable for sewing thinner leathers together. Use paper clips or Wonder Clips to hold the edges together as you sew. Press the seam open and topstitch to hold the seam allowance flat. If you prefer not to topstitch use a small amount of rubber cement or leather tape to hold the seams flat.
Lapped seams with a raw edge are suitable for thicker leathers. To make a lapped seam cut away the seam allowance from one of the seams. Chalk the stitching line on the underlayer. Use double-sided leather tape to align the top layer that has no seam allowance to the chalked line. Be sure to position the leather tape away from the stitching area, as stitching through the leather tape can cause skipped stitches. Offset the needle a few positions to the left and align the raw edge with the inside of the presser foot toe as you edge stitch.
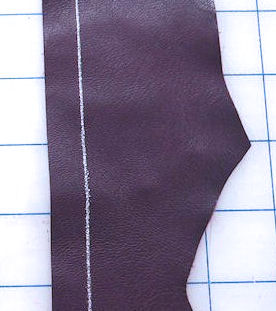
Lapped seam step 1: Chalk the stitching line on the underlayer.
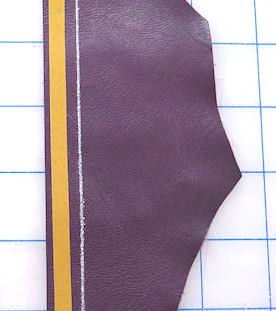
Lapped seam step 2: Apply double sided leather tape.

Lapped seam step 3: The overlayer has no seam allowance. Align the cut edge to the chalked line.
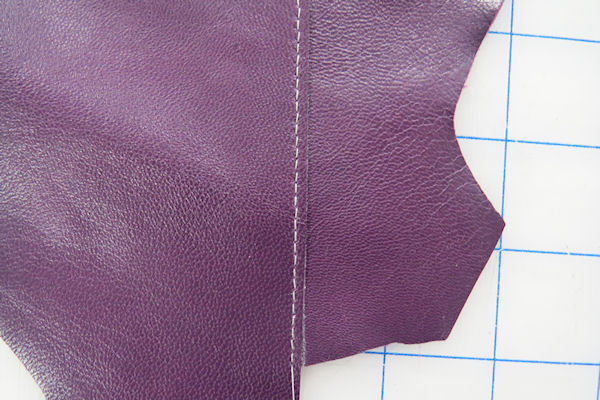
Lapped seam step 4: Stitch close to the cut edge through all layers.